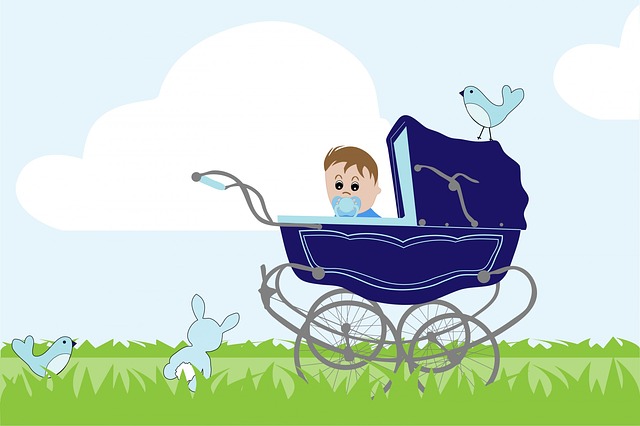
Colic

Severe pain in the abdomen caused by wind and suffered especially by babies.

To relive from pain follow these steps:-

  • Lay your baby on their tummy, across your stomach or lap. The change in position may help calm some colicky babies. You can also rub your baby’s back, which is both soothing and may help gas pass through.
  • Consider offering her a pacifier, or encourage baby to suck on her finger by gently putting it in her mouth. Gas does not cause colic, but some colicky babies also suffer from gassiness because they tend to swallow air while crying. Keep baby upright during feedings, and burp him often to try to ease gas pain.
  • A baby who has colic often cries about the same time every day, usually in the late afternoon or evening. Colic episodes may last from a few minutes to three hours or more on any given day.
  • generally recommend starting out with a traditional cow’s-milk formula, such as Enfamil and Similac, which contain a blend of whey and casein proteins. While the majority of infants do fine on these, colicky babies sometimes benefit from a different variety.
  • Walk him in kangaroo-style.
  • Make good vibrations.
  • Swaddle him.
  • Give him a massage.
  • Reduce outside stimulation.

To read more on Baby care, click on the link below,

New Born

Dealing with Measles

Dealing with Measles by Famhealth

Measles is a highly contagious infection caused by the measlesvirus. Initial signs and symptoms typically include fever, often greater than 40 °C (104.0 °F), cough, runny nose, and inflamed eyes. Two or three days after the start of symptoms, small white spots may form inside the mouth, known as Koplik’s spots.

  • A runny or blocked nose
  • Sneezing, watery eyes and swollen eyelids
  • Red eyes that may be sensitive to light
  • A high temperature which may lead to 40C (104F)
  • Small greyish white-spots in the mouth
  • Aches and pains
  • A cough and loss of appetite
  • Tiredness, irritability and general lack of energy.

Treatment

There is no specific treatment for measles, but the condition usually improves within 7 to 10 days. Stay away from school or work for at least four days.

If the symptoms of measles are causing discomfort for you or your child, there are some things you can do to treat these while you wait for your body to fight off the virus.

Dr. May advise some medicine to reduce a high temperature (fever) and relieve any aches or pains if your child is uncomfortable.

If your child has a high temperature, make sure they drink plenty of fluids as they may be at risk of dehydration.

Vaccination

The measles, mumps, and rubella (MMR) vaccine is routinely given at 12 to 15 months of age, followed by a booster shot before entering school at the age of 4 to 6 years.

To read more on Baby care, click on the link below,

New Born

How to Nebulize

How to Nebulize your Baby by Famhealth

How to Nebulize your Baby

It is the process of medication administration via inhalation . It utilizes a Nebulizer which transports medication to the Lungs.

Illness Like:

  • Pneumonia
  • Asthma
  • Bronchitis
  • Allergies
  • Breathing difficulties
  • Wheezing, etc

In babies we are using mask method .It’s more useful because it’s more comfortable and effective method for baby’s

Reason behind that is the babies are more restless and crying also.

Preparing to use a nebulizer for baby

  • First check Nebulizer is working or not and any loose connections. Clean all parts of nebulizer like nebulizer mask, tubing’s and medicine cup then wipe it dry.
  • Wash your hands under running tap water for 20sec with soap or you can use hand rub.
  • Place the medication into the nebulizer. Unscrew the top of the nebulizer cup and put the prescribed medication into the nebulizer. Many types of respiratory medications for nebulizer treatments come in pre-measured doses. If yours is not pre-measured, measure out the exact amount prescribed for one dose. Secure the top tightly to prevent the medication from spilling out.
  • Attach the mouthpiece. Secure it to the nebulizer cup. Although different manufactures may have slightly different jet nebulizers, most mouthpieces will attach to the top of the nebulizer cup. Most nebulizers have mouth pieces instead of face masks, since masks can lead to facial deposits.
  • Connect the tubing. Attach one end of the oxygen tubing to the nebulizer cup. On most types of nebulizers, the tubing will connect on the bottom of the cup. Connect the other end of the tubing to an air compressor used for nebulize
  • Keep the mask on baby nose and hold it.Hold the baby. Sitting in your lap and make sure the mask is in correct place.
  • Using an aerosol mask as an alternative to a mouthpiece for baby’s and young children. Aerosol masks attach to the top of the nebulizer cup or medicine cup. (The mask comes in paediatric and adult sizes.
  • Set up an activity to occupy baby during the nebulizer treatment. Showing some toys etc may help the child sit still for the length of the treatment. Ideally, hold the child in your lap since the child should be sitting straight up to receive the optimal dosage of medication.
  • The time duration of the inhalation is [5-8 mint]
  • Wipe the baby face with small soft towel.
  • Clean the nebulizer as directed by instruction.
  • Hand wash.
  • The mask and medicine cup should be washed with warm water .If it possible to soak the pieces in a warm water for 20mints and disinfect it. After disinfect it make it dry and keep it in proper place

To read more on Baby care, click on the link below,

New Born

Dealing with Fever

Dealing with Fever by Famhealth

Fever occurs when body temperature is above normal range  ie above 36.5 degree Celsius or 98.6 degree Fahrenheit.

A high body temperature, or fever, is one of the ways our immune system attempts to combat an infection resulting in sudden rise in white blood cell (WBC)count. Usually, the rise in body temperature helps the individual resolve an infection. However, sometimes it may rise too high, in which case, the fever can be serious and lead to complications.

Following are the Dos and Donts of fever care viz.

Dos:

  • Rest and eat a low-impact diet, fruit is ideal. Avoid food that uses lots of digestive energy like meat. If you have no appetite then don’t eat but do drink adequate water
  • Keep the room well ventilated allowing more fresh air or sunshine that will drive away any indoor pollutants and have positive impact on health.
  • In case of fever with temperature like 102 degree F  , we can give Cold sponge to reduce temperature.

Don’ts

  • It is usually best to not suppress low fevers (under 100 degrees) by taking pills. Fevers are part of a purging and cleansing process so it’s best to work with it rather than against it. Higher fevers can be life-threatening, best to seek immediate professional opinion.
  • Keep in mind that allopathic medicine is concerned mainly with the alleviation of symptoms rather than the healing process itself. Some acute illnesses require symptom relief.
  • Dont  bundle up extra with blankets thinking sweating may help to recede fever .It may  provide relief but chances are it may rise temperature further.
  • In case of children be extra careful while handling thermometers.

How to check temperature?

Things required:

  • You need a digital thermometer.
  • Diluted detol liquid soaked cotton balls to clean the thermometer.
  • Clean dry cottons to clean the thermometer before use.
  • Bowl to collect the used cottons.

Make sure:

  • Baby is not wearing a lot of clothes
  • Don’t check temperature soon after a bath
  • Baby is not wrapped up tightly in blanket. Remove the blanket
  • Open the windows and make sure room is not very warm
  • If this is the case, allow them to cool down for a few minutes (without allowing them to become cold or shivery), and take their temperature.

Procedure:

  • Wipe the thermometer using the dry cotton ball.
  • Switch on the thermometer and make sure you see display L0
  • Hold your baby comfortably on your knee and place the thermometer under the baby’s armpit.
  • Gently but firmly hold their arm against their body to keep the thermometer in place, for the time stated in the manufacturer’s instructions (usually about 15 seconds).
  • Some digital thermometers beep when they are ready. The display on the thermometer will then show the baby’s temperature
  • Normal  baby temperature is  97.4° (Fahrenheit) , 36.4°) (Celsius)
  • If the temperature is above 100° F (37.5° C), it means the baby may be having fever.

Other signs of fever are:

  • Irritable cry
  • Refusing feeds
  • Thermometer Usage:-

Thermometer is a device for measuring body temperature of an individual  to assess febrile condition.

  • Following are the Do’s and Don’ts of using a thermometer viz;

Do’s:

  • Compare the accuracy, suitability, convenience and price of thermometers before purchase.
  • Choose a thermometer and method of measurement which suit the individual‘s age and health condition ;Consult healthcare professionals if in doubt.
  • Familiarise with the correct use of thermometer and temperature reading by referring to the user instructions provided by manufacturer .Check temperature at eye level.
  • Clean and maintain the thermometer according to the procedures recommended by the user instructions.
  • In case body temperature needs to be taken regularly, take the temperature at the same time of each day and use the same temperature taking method to allow comparison.
  • If there is any doubt about the body temperature reading, please consult healthcare professionals.

Don’ts:

  • Avoid activities that would distort temperature measurement (e.g. drinking hot water immediately before taking oral temperature)and in case of axillary temperature do not keep the thermometer over the clothing.
  • Don’t put clinical/glass thermometer inside mouth of infant or those below 5 years.
  • Don’t touch the bulb of the temperature while measuring as it will give incorrect reading.
  • Don’t shake the thermometer too hard as you may drop it.
  • Preferably Digital thermometer should be used.

Types of thermometer:

  • Mercury-in-glass/ Alcohol-in-glass Thermometer– Measures oral or armpit body temperature through the thermal expansion of mercury/ ethanol.
  • Electronic (digital) Thermometer-Measures usually axillary temperature

Steps of using a digital thermometer:

  • Firstly make the patient lie/sit down in a comfortable position and ask them to loosen their clothes for easy access.
  • Clean the thermometer from bulb to stem using alcohol swabs. In case of digital ones just switch on the on button and place them at axilla.
  • In case of Axilla, make sure armpit is dry and clean before putting thermometer as moisture/sweat may hinder correct reading.
  • In case of digital ones, an automated beep sound is heard once temperature is recorded.
  • Read the temperature.
  • Now clean the thermometer from stem to bulb with alcohol swab and keep it aside.
  • Comfortably position patient and record the findings.

To read more on Baby care, click on the link below,

New Born

Dealing with Chickenpox

Dealing with Chickenpox by Famhealth

An infectious disease causing a mild fever and a rash of itchy inflamed pimples which turn to blisters and then loose scabs. It is caused by the herpes zoster virus and mainly affects children.

Before the rash appears, there will be:

  • A general feeling of being unwell (malaise)
  • Fever, which is usually worse in adults than children
  • Aching muscles
  • Loss of appetite
  • Nausea

After the rash appears, there will be:

Rash: Severity varies from a few spots to a rash that covers the whole body.

Spots: The spots develop in clusters and generally appear on the face, limbs, chest, and stomach. They tend to be small, red, and itchy.

Blisters: Blisters can develop on the top of the spots. These can become very itchy.

Clouding: Within about 48 hours, the blisters cloud over and start drying out. A crust develops.

Healing: Within about 10 days, the crusts fall off on their own.

During the whole cycle, new waves of spots can appear – in such cases, the patient might have different clusters of spots at varying stages of itchiness, dryness, and crustiness.

Treatment:

Chickenpox generally resolves within a week or two without treatment but a vaccine can prevent it.

Create an awareness how to prevent the infection from spreading to other people.

Pain or fever: Some time Dr. May advise to take medicine to treat the fever and pain.

Avoiding dehydration: It is important to drink plenty of fluids, preferably water, to prevent dehydration. Some doctors recommend sugar-free popsicles for children who are not drinking enough.

Vaccination: For children, 2 doses of the varicella vaccine are given, one at 12 to 15 months and one at age 4 to 6 years. These are 90 percent effective at preventing chickenpox.

To read more on Baby care, click on the link below,

New Born

Check List for New Dads

Check List for New Dads by Famhealth

Involvement with your child is critical. These are some ways to form a bond and develop a close relationship with your child from an early start. Start off on the right path, make the commitment to spend time with your baby, and relax, you’re going to be a great dad.

Before baby arrives:

  • To attend antenatal classes with your partner and do some research of your own.
  • The baby arrives will allow them to get to know your voice which will help to comfort them once they arrived.
  • Thank everyone and anyone who helps you, whether they’ve offered or you have to ask them to
  • Get to know the bump! Reading, singing and talking to your partners bump even before baby arrives will allow them to get to know your voice which will then help to comfort them once they arrive.


Once baby arrives:

  • Wash your hands before touching baby or use hand rub.
  • Try to support your partner as much as possible by making a few meals.
  • Support your partner while breast feeding.
  • Make sure you get lot of skin to skin contact with Baby.
  • Should know the importance of breast feeding.
  • Support your partner to come out of night mares and night terrors.

Baby Care

  • Know baby hunger clues: chewing on fingers, smacking lips, rooting for breast, crying
  • Talk, sing, and play with baby
  • Keep cord and/or circumcision clean and dry
  • Call lactation consultant with breastfeeding problems
  • Take an infant CPR/First Aid class
  • Have a frustration action plan
  • Go to well-baby check-up appointments
  • You and your partner will be sleep deprived. Sleep in shifts

To read more on Baby care, click on the link below,

New Born

Travelling with Baby

Travelling with Baby by Famhealth

Little travelers need a surprising amount of stuff!

Here is a checklist of items that make traveling much easier.

Packing Checklist:

  • Diapers (carry extras incase of delay)
  • Pad/rubber sheet (to put under your baby during diaper changes)
  • Blankets 1 or 2 (cover your baby and cover yourself)
  • Plastic bags (Carry a variety of sizes for storing soiled diapers, clothes, and blankets.)
  • Diaper rash cream.
  • Wipes.
  • Sanitizer, baby wash, and baby lotion.
  • Tissues.
  • A few of your baby’s favorite toys.
  • Clothes, socks, and booties or shoes (One to two outfits per day is a good guideline.)
  • Washable bibs
  • Sun hat
  • Lightweight plastic feeding set with utensils, and baby food
    If your baby’s eating solid foods.
  • Sterilizer (if staying outside more than 1 day)
  • Formula, water, and juice if appropriate
  • Extra bottles, nipples, and sippy cups if appropriate
  • Energy-boosting snacks for you to munch on
  • Breast pump (if you use one)
  • Nightlight (So you can keep the room lighting soothingly low during middle-of-the-night diaper changes)
  • First-aid kit (Baby pain reliever and supplies for treating minor injuries, fever etc.)
  • Sling or front carrier
  • Portable crib or play yard – A safe place for your baby to sleep or play.
  • Inflatable baby bathtub (Can make bath time easier at your destination).
  • Car seat for safer travel by car or plane
  • Collapsible stroller (If you are using it).
     

Preparation techniques:

  • Start preparing to pack a few days before you travel. Keep a running list of things to take, or put items out on a table or dresser as you think of them.
  • Pack each of your baby’s outfits in its own zipped plastic bag so you don’t have to hunt around for tiny socks, shirts, and so on.
  • Take the phone number for your baby’s healthcare provider in case you have questions while you’re on the road.

To read more on Baby care, click on the link below,

New Born

Teething Tips

Teething Tips by Famhealth

From the time your child’s first tooth emerges to how much pain it causes, teething is a different experience for every child. Here’s how to spot the signs that your baby is teething so you know how to treat the discomfort.

These are common signs of teething:

  • Drooling
  • Swollen, bulging gums
  • A tooth visible below the gum
  • Irritability
  • Trouble sleeping
  • Trying to bite, chew, and suck on everything
  • Rubbing her face
  • Rejecting food
  • Grabbing her ears

If your teething baby seems uncomfortable, consider these simple tips:

  • Rub your baby’s gums. Use a clean finger or moistened gauze pad to rub your baby’s gums. All you need is a clean finger for this old-fashioned teething remedy. Gentle counter-pressure from Mom or Dad applied to a baby’s sore gums can help ease the pain of teething
  • Keep it cool. A cold washcloth, spoon or chilled teething ring can be soothing on a baby’s gums. Don’t give your baby a frozen teething ring, however. Contact with extreme cold can be harmful. Try hard foods   
  • Use cold or frozen objects. Giving cold or frozen objects to your baby to chew on can help distract them from crying. In addition, it puts the baby’s mouth and gums at ease. Another useful remedy for teething babies is ice cubes.
  • Soothe Painful Gums. Normally, babies are able to find items they can chew on to help relieve the pressure
  • Give Painkillers in a Safe Way if advised by Doctors.
  • Create a Nice Environment.
  • Feed Soft Foods.
  • Maintain Bedtime Routine.
  • Deal with the Cry.

To read more on Baby care, click on the link below,

New Born

Great tools- Rocker/ Strolley/ Pram

Great tools- Rocker/ Strolley/ Pram by Famhealth

Key difference: Baby Pram and Stroller, are wheeled devices which are used to carry children. A baby pram is like a cradle in which babies can lie, whereas a stroller is like a chair in which babies can sit upright.

Rocker:

A bouncer is a seat suitable from birth until about 6 months that doesn’t rock, but is slightly flexible so that it moves slightly when you push it or when your baby kicks as she gets older. A bouncer usually has a bar with toys and lights, and some have music and vibrating options to help soothe your baby.

Buying Tips:

  • Modern gliders take up more room, but they come with comfy cushions. Add an ottoman so you have a place to rest tired feet.
  • When you shop, give each rocker or glider a test ride. It should move smoothly and silently. You don’t want your sleeping baby awakened to a symphony of squeaks and creaks.
  • The seat should be big enough to comfortably fit you and your growing baby.
  • Make sure the headrest is high enough so you can lean back against it. You’ll appreciate that feature during those exhausting late-night feedings.
  • Choose an easy-to-wash fabric. You’ll want it to come clean after baby spit-ups and spills.
  • Choose a colour that helps calm baby. Blue or green are good color choices.


Strolley:

A vehicle for moving a baby around that consists of a small bed supported by a frame on four wheels.

Buying Tips:

  • To keep baby secure, look for a T-shaped buckle that goes around your baby’s waist and straps between the legs.
  • The stroller should have brakes on the back wheels and locking front wheels.
  • When buying a stroller for two, tandem models (where one baby sits in front of the other) are easier to manoeuvre than side-by-side. 
  • The stroller seat should recline all the way back for your new-born, and adjust back up to a seat as your baby grows.

 Pram:

A pram is designed to carry new-borns and younger babies, usually while they’re lying down. It’s sturdy and generally can’t be folded flat. A stroller is lightweight and collapsible, ideal for older babies. A buggy can be a pushchair or a stroller, depending on who you ask!

Buying tips:

  • If you’re always on the go, buy a lightweight umbrella stroller. Just make sure it fully reclines.
  • Need a place to hold all your baby gear? A full-sized stroller will give you more storage room.
  • It should be solid, with a wide wheel base. When you push lightly on the handles, it shouldn’t tip backwards.
  • Make sure you can open the stroller easily with one hand. You don’t want to wrestle with it while holding baby in your other arm.
  • To keep baby secure, look for a T-shaped buckle that goes around your baby’s waist and straps between the legs.
  • When buying a stroller for two, tandem models (where one baby sits in front of the other) are easier to manoeuvre than side-by-side.

To read more on Baby care, click on the link below,

New Born

How to Wean a Baby and Start Solid Foods

Weaning a Baby off Breast Milk and Starting Solid Foods

Weaning a Baby off Breast Milk and Starting Solid Foods

Weaning is the gradual process of introducing semi-solid food while continuing with breast milk or infant formula milk.

Weaning means introducing a range of foods gradually until your baby is eating the same foods as the rest of your family.

When to start weaning:

The ideal time to start weaning is after 6 months of age.

How to know a baby is ready for weaning:

  • Baby shows interest in foods and can sit up.
  • Baby opens his mouth when food is offered.
  • Baby can turn head away when he is full.
  • Baby can pick up foods for self feeding.

Important points should be kept in mind while preparing and feeding a baby :-

  • Allow the infant to become familiar with the food before trying to give another.
  • Introduce one food at a time.
  • Give very small amounts of any new food at the beginning.
  • Use a very thin consistency when starting solid foods.
  • Variety in choice of foods is important.
  • Give freshly prepared food. Allow the baby to feed self, using their fingers, as soon as they show an interest.
  • Encourage the baby to chew, even if they don’t have teeth, by giving finger foods.
  • Finger foods provide chewing practice and encourage babies to feed self. It is a gradual process of introducing first Liquid foods followed by Semi solids and Solid foods.

Process of weaning:

  • First start with Liquid Foods(Milk, Fruit juice, Soups, Dal water)
  • Then start with Semi-Solid Foods (Mashed banana, Rice flour, Khichdi, Kheer)
  • Lastly include Solid Foods(Rice, Roti, Dal with vegetables, Bread)

Important dos and don’ts:

  • Use only clean utensils
  • Cooked food should be covered to protect it from the flies and dust
  • Use prepared feed within half an hour
  • Discard unused feed
  • Never leave baby alone when eating.
  • Figure out the foods the baby is allergic like nuts,soy,gluten,cow milk etc.

Introducing Solids For Babies

According to the World Health Organization the right age to wean our baby is around six months .Till six months babies get enough nutrition from breast milk. Some babies though are hungrier and start losing or not gaining weight beyond 4 months, and they would have even started crawling by then, if this happens we would recommend weaning at or after 4 months of age. However, introducing solid foods before 4 months is not recommended, as your baby can not digest food properly.

The Golden Weaning Rules

  • Get the order – Always start with carbohydrates first and then protein. For vegetarians it is pulses and legumes unlike non vegetarians who can introduce chicken, fish and meat, and fats are the last food to be introduced to babies. Never introduce egg white or cow’s milk in to their diet until the age of 1 year.
  • Start weaning with either fruits or vegetables pureed, or rice or raagi cooked using plain boiled water. After a week or so, move to vegetables such as carrot or sweet potato, or vice versa if you have started with the cereals first.
  • Don’t mix flavours- Start your baby on single rather than mixed food’s. Mixing flavours at this stage can blur a child’s sense of taste. You can use a part of the vegetables you cook for yourself, just puree them individually for the first couple of months of weaning.
  • Encourage for self-feeding. The aim is to get your baby to feed himself as soon as he can pick up and hold food.
  • Increase their water intake. When baby’s starts on solids they need more water.  Avoid any other drinks apart from milk, fruit juices is another good source of water.
  • Know when they have had enough. If you are using a spoon, and after eating well your baby turns his face away or looks down, then stop feeding. It is a sign that you are over feeding him.
  • Eat with them. Put your baby in a high chair as soon as he can sit up unaided and have him eat with you. Eating with the family will encourage your child to try a wider range of food items.

Salt: Never add any salt to the foods you give to your baby because their kidneys cannot cope with it.

Sugar: Sugary foods and drinks are not recommended for babies under a year, as they can encourage a sweet tooth and lead to decay when teeth come through.

To read more on Baby care, click on the link below,

New Born