
First Aid for Resuscitation
Resuscitation is the process of correcting physiological disorders (such as lack of breathing or heartbeat) in an acutely unwell patient. It is an important part of intensive care medicine, trauma surgery and emergency medicine. Well known examples are : cardiopulmonary resuscitation and mouth-to-mouth resuscitation.
First aid kit contents and supplies checklist
- Sterile dressings and plasters:
- Plasters: Use plasters for small cuts and grazes.
- Sterile pad: For more cushioning you can use a sterile pad and hold it in place with sticky tape. You could also use any clean, non-fluffy material, like a cloth scarf.
- Sterile wound dressing: A sterile wound dressing is a sterile pad attached to a bandage. These are for larger wounds to apply pressure to help stop bleeding and are quick and easy to put on in an emergency.
Bandages:
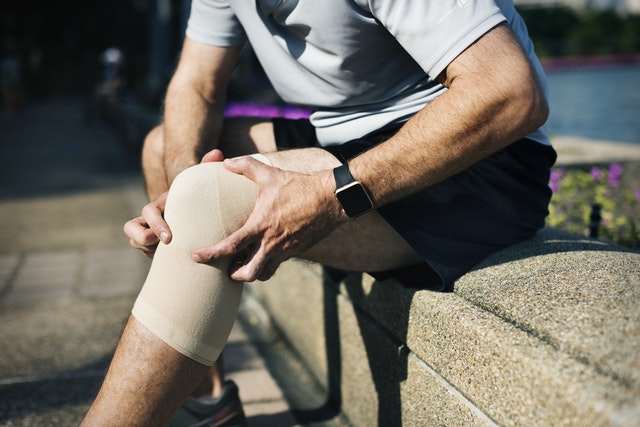
- Roller bandages: Roller bandages are long thin bandages rolled up. Use a roller bandage to support joint injuries, hold dressings in place, put pressure on wounds to stop bleeding, and to reduce swelling
- Triangular bandages: Triangular bandages are large triangular shaped pieces of cloth. You can fold a triangular bandage to use as either a bandage or sling, or, if sterile, as a dressing for large wounds and burns.
Protective items:
- Disposable gloves: Using disposable gloves reduces the risk of infection between you and someone you’re helping. If they’re available, always wear gloves whenever you dress wounds or deal with any body fluids or waste
- Face shields or pocket masks: These are designed to prevent infection when you give rescue breaths.
Other items:
- Cleansing wipes, alcohol free wipes: To clean the skin around the wound
- Gauze pads as dressings: To use as padding, or as swabs to clean around wounds
- Sticky tape (adhesive tape): To hold dressings in place or to hold the loose end of bandages
- Pins and clips: To fasten the loose end of bandages
- Scissors, shears and tweezers: To cut sterile pads, bandages or sticky tape to the right length. You can also use them if you need to cut someone’s clothing, so that you can get to a wound, for example.
Useful extras:
- Use kitchen film or clean plastic bags: To dress burns and scalds
- Use alcohol gel: To clean your hands if you can’t find any water to use
For outdoors:
- Use a blanket: To keep someone warm and protect them from the cold
- Use survival bags: To keep someone warm and dry in an emergency
- Use a torch: To help you see when it gets dark and to attract attention or make others aware that you’re there
- Use a whistle: To help attract attention and get help
For the car, in case of road accidents:
- Warning triangle: Put this on the road to warn other drivers to slow down
- Wear a high visibility jacket: To make sure drivers can see you and reduce the risk of you getting hurt as well.
CPR with rescue breaths
Adults
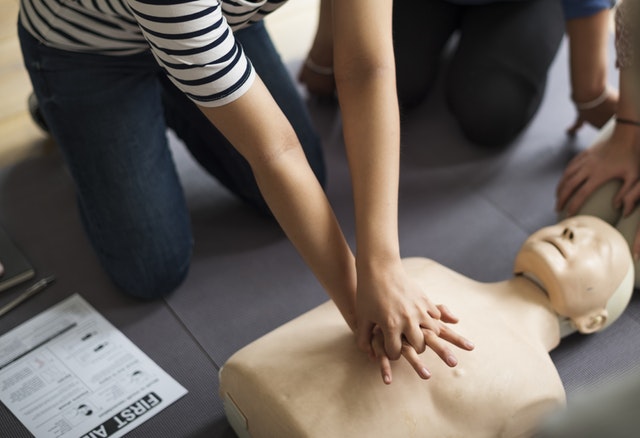
- Place the heel of your hand on the centre of the person’s chest, then place the other hand on top and press down by 5-6cm (2-2.5 inches) at a steady rate of 100 to 120 compressions per minute.
- After every 30 chest compressions, give two rescue breaths.
- Tilt the casualty’s head gently and lift the chin up with two fingers. Pinch the person’s nose. Seal your mouth over their mouth and blow steadily and firmly into their mouth for about one second. Check that their chest rises. Give two rescue breaths.
- Continue with cycles of 30 chest compressions and two rescue breaths until they begin to recover or emergency help arrives.
Children over one year old
- Open the child’s airway by placing one hand on the child’s forehead and gently tilting their head back and lifting the chin. Remove any visible obstructions from the mouth and nose.
- Pinch their nose. Seal your mouth over their mouth and blow steadily and firmly into their mouth, checking that their chest rises. Give five initial rescue breaths.
- Place the heel of one hand on the centre of their chest and push down by 5cm (about two inches), which is approximately one-third of the chest diameter. The quality (depth) of chest compressions is very important. Use two hands if you can’t achieve a depth of 5cm using one hand.
- After every 30 chest compressions at a rate of 100 to 120 per minute, give two breaths.
- Continue with cycles of 30 chest compressions and two rescue breaths until they begin to recover or emergency help arrives.
Infants under one year old
- Open the infant’s airway by placing one hand on their forehead and gently tilting the head back and lifting the chin. Remove any visible obstructions from the mouth and nose.
- Place your mouth over the mouth and nose of the infant and blow steadily and firmly into their mouth, checking that their chest rises. Give five initial rescue breaths.
- Place two fingers in the middle of the chest and push down by 4cm (about 1.5 inches), which is approximately one-third of the chest diameter. The quality (depth) of chest compressions is very important. Use the heel of one hand if you can’t achieve a depth of 4cm using the tips of two fingers.
- After 30 chest compressions at a rate of 100 to 120 per minute, give two rescue breaths.
Continue with cycles of 30 chest compressions and two rescue breaths until they begin to recover or emergency help arrives. American Heart Association:
- Untrained : If you’re not trained in CPR, then provide hands-only CPR. That means uninterrupted chest compressions of 100 to 120 a minute until paramedics arrive (described in more detail below). You don’t need to try rescue breathing.
- Trained and ready to go : If you’re well-trained and confident in your ability, check to see if there is a pulse and breathing. If there is no breathing or a pulse within 10 seconds, begin chest compressions. Start CPR with 30 chest compressions before giving two rescue breaths.
- Trained but rusty : If you’ve previously received CPR training but you’re not confident in your abilities, then just do chest compressions at a rate of 100 to 120 a minute. (Details described below.)
**The above advice applies to adults, children and infants needing CPR, but not newborns.
Before starting CPR, check:
- Is the environment safe for the person?
- Is the person conscious or unconscious?
- If the person appears unconscious, tap or shake his or her shoulder and ask loudly, “Are you OK?”
- If the person doesn’t respond and two people are available, one should call 911 or the local emergency number and get the AED, if one is available, and one should begin CPR.
- If you are alone and have immediate access to a telephone, call 911 or your local emergency number, before beginning CPR. Get the AED, if one is available.
- As soon as an AED is available, deliver one shock if instructed by the device, then begin CPR.
Remember to spell C-A-B
Compressions: Restore blood circulation
- Put the person on his or her back on a firm surface.
- Kneel next to the person’s neck and shoulders.
- Place the heel of one hand over the center of the person’s chest, between the nipples. Place your other hand on top of the first hand. Keep your elbows straight and position your shoulders directly above your hands.
- Use your upper body weight (not just your arms) as you push straight down on (compress) the chest at least 2 inches (approximately 5 centimeters) but not greater than 2.4 inches (approximately 6 centimeters). Push hard at a rate of 100 to 120 compressions a minute.
- If you haven’t been trained in CPR, continue chest compressions until there are signs of movement or until emergency medical personnel take over. If you have been trained in CPR, go on to opening the airway and rescue breathing.
Airway: Open the airway
If you’re trained in CPR and you’ve performed 30 chest compressions, open the person’s airway using the head-tilt, chin-lift maneuver. Put your palm on the person’s forehead and gently tilt the head back. Then with the other hand, gently lift the chin forward to open the airway.
Breathing: Breathe for the person
Rescue breathing can be mouth-to-mouth breathing or mouth-to-nose breathing if the mouth is seriously injured or can’t be opened.
- With the airway open (using the head-tilt, chin-lift maneuver), pinch the nostrils shut for mouth-to-mouth breathing and cover the person’s mouth with yours, making a seal.
- Prepare to give two rescue breaths. Give the first rescue breath — lasting one second — and watch to see if the chest rises. If it does rise, give the second breath. If the chest doesn’t rise, repeat the head-tilt, chin-lift maneuver and then give the second breath. Thirty chest compressions followed by two rescue breaths is considered one cycle. Be careful not to provide too many breaths or to breathe with too much force.
- Resume chest compressions to restore circulation.
- As soon as an automated external defibrillator (AED) is available, apply it and follow the prompts. Administer one shock, then resume CPR — starting with chest compressions — for two more minutes before administering a second shock. If you’re not trained to use an AED, a 911 or other emergency medical operator may be able to guide you in its use5.Continue CPR until there are signs of movement or emergency medical personnel take over.
To read more on First Aid, click on the link below.