How to Breast Feed a Baby 
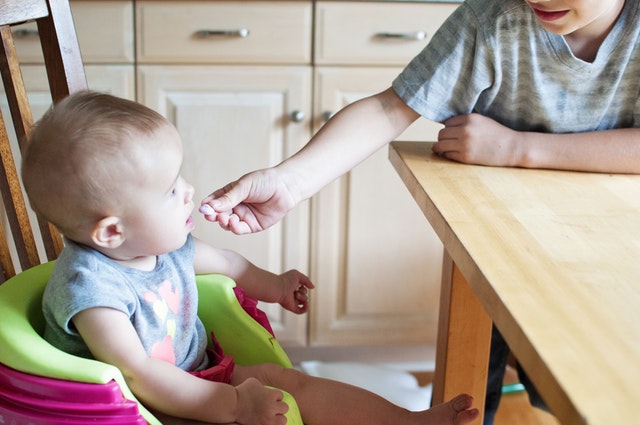
How to Breast Feed a Baby by Famhealth

Mother’s milk is perfect and uniquely made for the growing baby’s needs. Giving Mothers milk makes a big difference to both baby and mothers health.

Good for the mother:

  • Helps womb (uterus) come back normal size and reduces bleeding.
  • It naturally uses up about 500 extra calories a day so mums who breast-feed often find it easier to lose their pregnancy weight.
  • It reduces the risk of breast and ovarian cancer.
  • Breast-feeding acts as a natural family planning method.
  • It saves money – formula feeding can cost.

Good for the baby:

  • All Nutrients required for the first six months, Easy digestion.
  • Helps baby pass motion easily.
  • Provides immunity.
  • Readily available, usually sterile. No danger of allergy
  • More convenient, requiring no preparation and costs nothing.
  • Reduces chances of getting some illnesses later in life .
  • Make you closer with your baby.
  • Formula milk is made from cow’s milk and other ingredients: So does not help protect baby from illness and diseases.

First Feed:

  •  A healthy baby has put to the breast half an hr to 1 hr following normal delivery.
  •  Following caesarean delivery, a period of 2 to 3 hrs may be sufficient for the mother to breast feed the baby.

Getting ready for Feeding:

  • You should clean the nipples and breast with cotton soaked in warm water.
  • Wash your hands prior to breast-feeding.
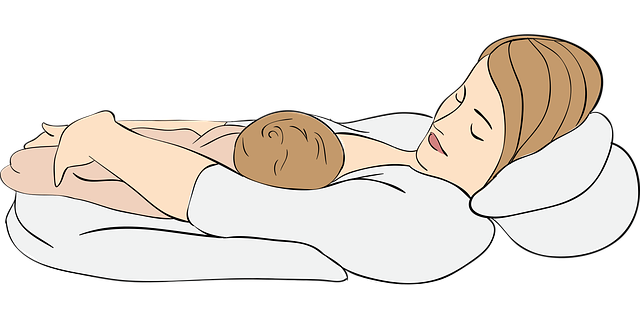
  • You and baby should be in a comfortable position during breast-feeding.

What can provide comfortable environment during feed?

  • You can sit on a chair or bed with back supported so that you will feels comfortable.
  • You could raise the feet or knees, if you needs to but should not bend over the baby.

How you should hold the baby?

  • Wrap the baby in a wrapper.
  •  Support the neck, shoulders and back.
  •  You should hold the baby close to you.
  •  He should be able to tilt his head back easily.
  •  Make sure baby’s head and body in a straight line.
  • If not, the baby might not be able to swallow easily.
  • Hold the baby’s whole body closes with his nose level with the nipple.
  • Baby needs to get a big mouthful of breast from underneath the nipple.
  • Placing your baby with his nose level with your nipple will allow him to reach up and attach to the breast well.
  • Let the baby’s head tip back a little so that his top lip can brush against your nipple. This should help the baby to make a wide-open mouth.
  • When the baby’s mouth opens wide, his chin is able to touch the breast first, with his head tipped back so that his tongue can reach as much breast as possible.
  • With his chin firmly touching and his nose clear, his mouth is wide open and there will be much more of the darker skin visible above the top lip than below his bottom lip. The baby’s cheeks will look full and rounded as they feed.

Nipple feeding is wrong:

  • When the baby isn’t correctly attached and just sucks the nipple, you feel feeding is painful, the nipples can get damaged, and the baby won’t be able to get enough milk.
  • Baby will not be satisfied
  • Milk production reduces
  • Cracked nipples may happen.
  • If baby is not attached correctly, stop avoids pulling him off your breast. Instead, break the attachment by inserting your little finger into the corner of her mouth, between her gums. Gently take her off the breast. Then make the latching perfect and start feeding.

How to make the baby burp

  • When babies suckle they swallow air, which can make them uncomfortable.
  • Burping is a process by which you can help a baby bring this air up and feel comfortable.
  • First spread a cloth (burp cloth) on your shoulder
  • Hold the baby on your shoulder or chest and rub its back
  • You can also or rub baby’s back while the baby sits or lies on your lap.
  • These positions will also help comfort a restless baby or a baby that cries more than usual.

Usually you will hear a burp noise.It is normal for babies to bring up some fluids when they burp.

If you put the baby to sleep without burping   they may vomit and that may enter the lungs causing difficulty in breathing.

To read more on Baby care, click on the link below,

New Born

Holding a newborn baby

Holding a newborn baby by Famhealth

All of us love to cuddle and hold a baby .But most of us are sceptical of how to hold a small baby. Below are some of the steps that can make newborn handling much easier and safer viz:

Step 1: Wash your hands-Always make sure your hands are clean before you pick up your baby. Baby’s immune system is still developing, so any germs you carry may make them sick. While lathering with soap and warm water works well, consider keeping hand sanitizer around for guests who also want to cuddle your little one. Clean your hands each time before holding your baby.

Step 2: Get comfortable-Comfort is one of the most important things about holding your baby. Not only do you want to feel physically comfortable, but you also want to feel confident in your hold.

Step 3: Provide support-When holding a newborn, it’s very important to always have a hand to support the head and neck. After all, your baby’s head is the heaviest part of their body at birth. Pay special attention to baby’s fontanelles, which are the soft spots on the top of their head.

Newborns lack the critical neck muscle control to keep their heads supported on their own. This milestone isn’t usually reached until closer to FOUR months.

Step 4: Choose your position-Holding starts with picking baby up. When you go to lift your baby, place one hand under their head and another under their bottom. From there, raise their body to your chest level. As long as you’re supporting baby’s head and neck, the position is up to you. There are a variety of holds you and your baby might enjoy. Some of these positions are also great for breast-feeding or burping. Various positions are as follows viz

Cradle Hold

The cradle hold is one of the easiest and best ways to hold your newborn for the first several weeks of life:

  • With your baby horizontal at your chest level, slide your hand from their bottom up to support their neck.
  • Gently nudge baby’s head into the crook of your elbow.
  • While still cradling their head, move your hand from the supporting arm to their bottom.
  • Your free arm will be able to do other things or provide extra support.

Shoulder hold

  • With baby’s body parallel with your own, lift their head to shoulder height.
  • Rest their head on your chest and shoulder so they can look out behind you.
  • Keep one hand on their head and neck, and your other supporting baby’s bottom. This position may also allow baby to hear your heartbeat.

Belly hold

  • Lay your baby, stomach down, across your forearm with the head up toward your elbow.
  • Their feet should land on either side of your hand, angled closer to the ground so the baby is at a slight angle.
  • This position is helpful if baby is gassy and needs to be burped. Gently stroke baby’s back to work out the gas.

Lap hold

  • Sit in a chair with your feet firmly on the ground and place your baby in your lap. Their head should be at your knees, face up.
  • Lift their head up with both of your hands for support and your forearms under their body. Baby’s feet should be tucked in at your waist

Do’s:

  • Try skin-to-skin contact while holding baby. It’s a great way to bond and keep them warm. You can strip baby down to their diaper, place them against your bare chest, and cover with a blanket.
  • Choose a seated position if you feel nervous about holding baby. Sitting down is also a good idea for anyone who might not have the strength to support baby’s weight, like children and older individuals.
  • Use a baby carrier  for hands-free holding. Follow all instructions on the carrier’s packaging. It suggests age-appropriate holds and positions.
  • Use an infant support pillow, when holding baby for extended periods of time or to help with breast-feeding.
  •  Hold your baby with both hands while you’re going up and down the stairs for added safety.

Dont’s

  • Do not cook or carry hot drinks while holding baby. Knives, flames, and excess heat are dangerous and could lead to injury by accident. Stay away from others who are working with those things near you.
  • Do not ever shake your baby, whether to play or to express frustration. Doing so can cause bleeding in the brain and even death.

To read more on Baby care, click on the link below,

New-Born

Baby Care Essentials

Baby Massage 

Baby Care Essentials 
Baby Massage by Famhealth

Body massage is given to baby for smoothening the skin, make the baby feel fresh, relaxed and to improve the blood circulation.

You can do body massage after bath or before bath. As per mother permission you can use oil or baby body lotion

Items Required:

  • Rubber or Plastic sheet
  • Baby body lotion or Oil
  • Wrapping cloth

Procedure:

  • Wash your hands
  • Collect the items required
  • Please switch of the A/C or Fan.
  • Spread the rubber sheet or plastic sheet over the bed or floor.
  • Take the oil in bowl, warm the oil if required and check the warmth before applying on Baby
  • Make the baby ready by removing the dress and napkins and place the baby on plastic sheet

Steps to follow:

  • Legs,
  • Calves,
  • Thighs,
  • Chest,
  • Tummy,
  • Both hands,
  • Face,
  • Back.

Leg: Take the oil or lotion apply over the base of the foot and massage with your thumb finger from the heel towards the toes for minimum 5 times, then spread the toes for 5 times.

Next, massage both the ankle joints in a rolling manner by using your thumb fingers for five times.

CalvesThere are two types of calves’ massage.

  • Swedish milking

Swedish milking: First apply oil or lotion over the legs then start massage from ankle joint to knee joint for 5 times (both the side) Then from knee joint to groin area for 5 times (both the side).

  • Indian milking– (Prefer to give type 1, If the mother ask for type 2 then u can also give type 2 massage.)

Indian milking: Massage starts from groin area towards foot. (This is optional only if mother ask)

Chest:Take the oil or lotion, apply over the chest to shoulder and massage from down to up and inner to outer side 5 times (like broadening the chest)

Next move your hands in a cross manner from left to right and right to left.

AbdomenApply oil or lotion over the abdomen and massage 5times from up to down then circular motion. (Always abdominal massage should do in the clockwise manner without touching umbilical cord).

Hands: Swedish milking is better for both the hands and legs than Indian milking. If you do Indian milking for the hands and legs, then end up with Swedish massage.

Face: Massage cheek gently with circular motion then forehead by using thumb. (Face massage is not compulsory)

Back: Apply oil and massage from up to down five times then massage from one side to another side for five times.

Buttocks: Massage the buttocks from down to up for 5times.

After completing the massage, Turn the baby slowly, place the baby on sheet, and wrap the baby in wrapping cloth.

Replace the articles in proper place.

Do’s:

  1. Always hands and legs massage should be done towards the heart.
  2. Always abdominal massage should be done only clockwise.

Don’ts:

  1. Do not turn babies below 3 months,
  2. Don’t do head massage,
  3. Do not apply oil over the head and face (except cheeks and forehead)

Baby Bath

Baby Bath by Famhealth

There is no need to give a newborn bath every day. In fact, bathing the baby more than several times a week can dry out his or her skin.

It does not matter when you give a bath and make sure do not do soon after a feed.

Itmes Required:

  • Bath tub
  • Bowl with 2-cotton ball for cleaning eyes
  • Body wash (Soap/ Shompoo)
  • Large Towel
  • Wrapping cloth
  • Alcohol swab for cord care
  • Baby dress, napkins or diaper
  • Dust bin.
  • Nail cutting scissor for nail cutting

Procedure:

  • Wash your hands thoroughly .
  •  Collect the items required
  • Add warm water and cold water in a tub up to 2-3 inches and check for the temperature of the water from the elbow. 
  • Remove the baby’s cloths and clean the diaper area top to bottom by using wet wipes. (Check if baby has passed urine or motion)

Steps to be followed:

  • Clean the both eyes with cotton balls inner cantus to outer cantus with clean water.
  • Next Clean the face with warm water. Remember, do not apply soap to the face  and do not touch the eyes.
  • Wet the hair with the water and apply shampoo, then gently clean the hair
  • Pour fresh warm water over the head.
  • Next, wet the front part of the body and apply shampoo then gently clean, attention needs to be given to the areas like under arm, neck, groin, middle of the fingers and folding parts.  (Remember Do not touch the umbilical cord).
  • Then turn the Baby slowly and give bath on the back for the baby.
  • Pour fresh warm water all over the body and place the baby in towel.
  • Dry the baby face first, then head and finally the body.

 More attention should be given while drying the areas like under arm, back of the ear, neck, groin, middle of the fingers, diaper area, folding parts and in between the toes.

  • Clean the umbilical cord from alcohol swab.
  • Put the baby dress and napkin or diaper and wrap the baby using wrapping cloth.
  • Wash your hands.
  • Finally can give the feed.

How to fix a diaper

diaper or a nappy is a type of underwear that allows the wearer to defecate or urinate without the use of a toilet, by absorbing or containing waste products to prevent soiling of outer clothing or the external environment. When diapers become soiled, they require changing, generally by a second person such as a parent or caregiver. Failure to change a diaper on a sufficiently regular basis can result in skin problems around the area covered by the diaper.

Steps to follow for fixing diaper:

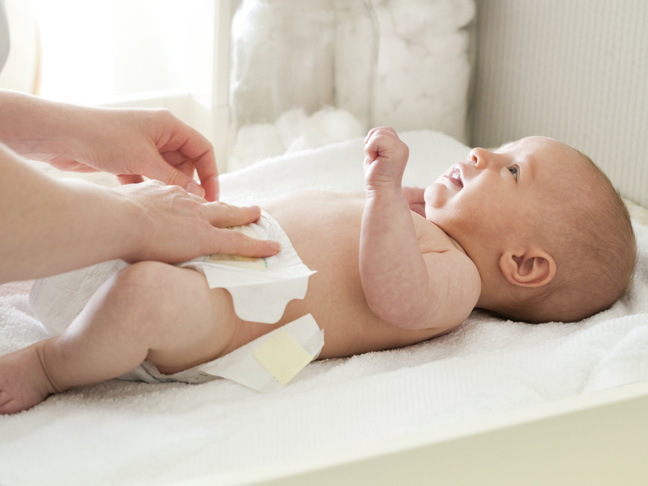
  • Lay your baby on his back. Remove any clothing that inhibits access to the diaper. At this age, rompers are popular clothing items; they contain snaps for easy diaper access.
  • Remove the soiled diaper. For disposable diapers, pull up the sticky tabs. For reusable cloth diapers, remove the diaper cover and snaps or Velcro from around your baby’s waist.
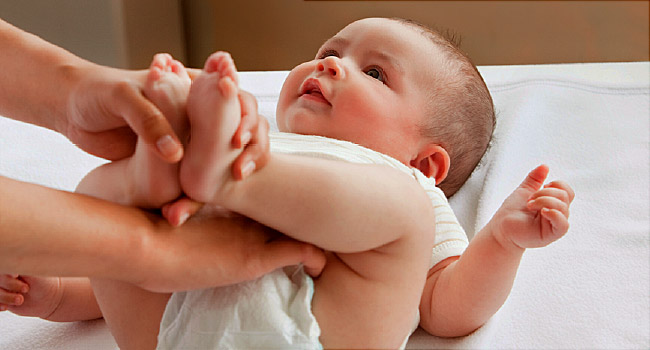
  • Lift your baby up gently so you can scoot the diaper out from under his bottom.
  • Use wipes to clean your baby’s diaper region. Always wipe from front to back to avoid infection, especially for girls.
  • If the area is red or inflamed, soothe it with diaper ointment.
  • Wait for your baby’s skin to dry before putting on a fresh diaper.
  • Take a fresh diaper and place it under your baby. Bring the front part up on your baby’s stomach and fasten the tabs to secure the diaper on his waist.
  • Replace any clothing over the new diaper.

How to Prevent Diaper Rash

Take these precautions to take to prevent diaper rash. If you suspect a diaper rash is becoming infected, always call the doctor.

  • Check your infant’s diaper often (every two hours) and change it promptly.
  • Clean your infant’s diaper region thoroughly during changes.
  • Do not use scented wipes or soaps on your infant’s diaper region.
  • Pat, do not scrub, a baby’s bottom when drying your infant after a bath.
  • Avoid plastic pants and look out for skin marks, which indicate the diaper is too tight.

Dealing with nappy rashes

There may be red patches on the baby’s bottom, or the whole area may be red. The skin may look sore and feel hot to touch, and there may be spots, pimples or blisters.

Nappy rash can be caused by:

  • Prolonged contact with urine  or stools
  •  Sensitive skin
  •  Rubbing or chafing
  •  Soap, detergent or bubble bath
  •  Baby wipes
  •  Diarrhea or other illness

These simple steps will help:

  • Change wet or soiled nappies as soon as possible. Young babies need changing as many as 10 or 12 times a day; older babies at least six to eight times.
  • Always have a good supply of nappies.
  • Watch for any allergies to the wet wipes or soap etc.
  •  If you find redness on the diaper area, avoid using diapers and keep the area dry always.
  •  Use diaper rash cream as per doctor’s advice.

To read more on Baby care, click on the link below,

New Born

Content Courtesy : Portea

Babycare – Ear and Nails

Nail Care

Babycare - Ear and Nails by Famhealth
  • The baby’s nails are softer then the adult nails
  • Babies nails are sharp and a newborn, who has little control over his flailing limbs, can easily end up scratching his own face.
  •  Longer nails also easily become ingrown, and in turn, infected.
  •  Little fingernails grow so fast you may have to cut them as often as a few times a week.
  • Toenails require less-frequent trimming.

Procedure:

  • Wash your hands.
  • The best time to trim nails is while he is sleeping, and after a recent bath when they are still very soft.
  • Press the finger pad away from the nail to avoid nicking the skin, keep a firm hold on your child’s hand as you clip, and cut straight across.
  • It might be easier and safer to use a nail file.
  • Clean the Baby hand with wet wipe and Replace the articles.
  • Wash your hands using 7 steps.

Ear Care

Ear and Nails by Famhealth

How to clean ears of a baby

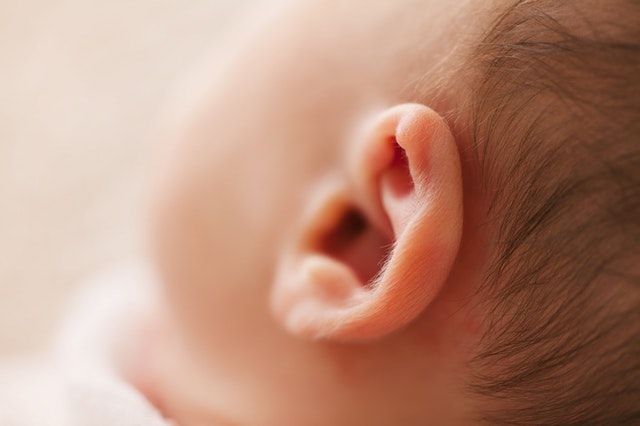
  • You don’t need to clean the inside of your baby’s ears. Wash behind his ears where spit-up milk can run.
  • It’s OK to get water in your baby’s ears.
  • Don’t try to dry the inside of your baby’s ears with cotton swabs (Q-tips); you can damage the eardrum.
  • Because a cotton swab is often what causes a wax buildup in the first place, you should never use one to clean a baby’s ear canals,
  • To get the water out, just gently turn her head to the side and let the water run out, then dry the outside of the ear with a soft towel.

How to take care of ear piercing?

We need to take precautions before and after piercing the ear.

The main precautions which we should follow before piercing is:-

Avoiding blood thinners: – Aspirin, alcohol and excessive amounts of caffeine are all blood thinners, so we should avoid these things the day you get pierced. If ignored it can leads to bleeding.

Precautions after piercing the ear:-

There are numbers of precautions to be taken after ear piercing. Hygiene is important to avoid the infection. Other precautions are: –

  • Wash your hands with antibacterial soap to avoid chances of infection.
  • Avoid touching the pierced area often.
  • Starter earrings- do not remove them prematurely; piercings may close or heal improperly.
  • Do not change the earrings for the first time eight weeks after getting pierced.
  • Do not use soap as it is harmful for healing ear piercings. It can dry out your skin and make more susceptible for developing a piercing infection.
  • Be careful with items that could snag your earrings. Hats, scarves, and other items that may catch on your earrings should be worn with care.
  • Avoid getting shampoo, conditioner, and other hair products on your ears, since the ingredients in these products could lead to an infection.
  • Sleeping with ear against the pillow can irritate your piercings.
  • Clean them three times a day
  • Clean both the front and the back of the piercing; making sure the entire area gets covered.
  • Gently rotate the earring two or three times to make sure the antiseptic gets inside the piercing.

See a doctor if there is any pus discharge, excessive itching, redness, and extreme pain are signs of an infection. Either remove the earring immediately yourself, or if it is too painful, have a doctor remove it.

To read more on Baby care, click on the link below,

New Born

Content Courtesy : Portea

Breast pump and storage

Breast pump and storage by Famhealth

Breast pump and storage

Expressing milk means squeezing milk out of the breast with the help of pump or by hand.

When should you express milk?

  • To collect milk to feed a premature baby or one who can’t latch on to your breast
  • When mother needs rest .
  • When mother goes to work
  • When the breasts are too engorged or swollen due to excess milk production.
  • Flat nipples
  • To keep your milk supply up if your healthcare provider advises you to stop nursing temporarily because you’re taking medication that might be harmful to your baby (this is rarely necessary) or if you’re hospitalized for a short time and can’t breastfeed throughout the day.

There are 2 ways breast milk can be expressed:

  • Manual or by Hand
  • Using Breast pump (Manual and electrical pump)

Preparation for expressing breast milk:

  • Find a quiet, comfortable place to sit.
  • Have a glass of milk or warm water or some snack.
  • Plug in your pump or make sure it has working batteries.
  • Wash your hands with soap and water. 
  • Assemble the pump kit.
  • Clean the breast with warm water with the help of cotton.

Using a manual Breast pump:

  • Place the breast shield over your nipple. Make sure that you have the appropriate-sized shield for your breast. Selecting an inappropriately sized shield can result in failed suction efforts, pain, and irritation.
  • Use the squeeze or plunging mechanism to begin pumping. Hold the shield in place with one hand and squeeze the mechanism with the other. The milk will begin pumping into the bottle.
  • Reposition the pump’s handle if necessary. Changing the position of the pump’s handle can affect its suction ability, so move it around until you find an appropriate suction level that makes your breast pumping efforts easier.
  • Try leaning forward to make milk express more easily.  Remember that at the beginning milk flows drop by drop and gradually it increases the flow when pumping is happening continuously.
  • Continue until the milk flow slows. When pumping with a manual pump, it usually takes about 45 minutes.

Using an electrical ot battery operated pump:

  • Position the breast shield over your nipple correctly. 
  • Turn the machine on and let it work. The milk will automatically begin pumping from your breast into the container.
  • Adjust the automatic suction as necessary. If the milk seems to be pumping slowly or the suction feels painful, adjust it. Try repositioning your breasts and the rest of your body. The process should not be painful, although it may feel strange at first.
  • Remain calm while the suction occurs.  However, if you’re relaxed, you will often produce more milk in less time than you would while anxious.
  • Continue until the milk flow slows. When using an electric or battery-operated pump, you should be finished within 15 to 20 minutes.

Remember:

  • Keep going! You’ll find pumping gets quicker and easier with practice.
  • Get relaxed. The pumping process is easiest and least uncomfortable when you’re feeling relaxed and calm.
  • Always clean your breast pump and its removable parts after a breast pumping session to avoid contamination.

Storing milk:

  • Mum’s milk can be kept at room temperature for upto 6 hours 
  • You can store mum’s milk in the fridge for up to 5 days at 4C or lower (usually at the back, never in the door).
  •  Mum’s milk can be stored for 2 weeks in the ice compartment of a fridge or for up to 6 months in a freezer.
  • Store away from meat products, eggs or any uncooked foods. Use the back of the fridge and not the door.
  • The more often the fridge door is opened, the more likely the temperature will rise.
  • Try to check the temperature of Every fridge (or bag) used for storing your milk each time you use it.

Using stored breast milk:

  • Don’t use a microwave or gas stove  to heat up or defrost breast milk as it can cause hot spots, which can burn your baby’s mouth.
  • Heat Refrigerated expressed breast milk by placing in warm water
  • Check the temperature before feeding the baby use defrosted breast milk immediately and throw away any unused milk.
  • If the milk smells sour -DO NOT USE.
  • When stored, the cream and milk may separate out. This is normal. Shake gently to mix before use.
  • Some babies are reluctant to take expressed breast milk, particularly at first. Try offering milk from a cup or spoon.

To read more on Baby care, click on the link below,

New Born

Baby Safety

Baby Safety by Famhealth

Baby Proofing is the act of making an environment or object safer for children.

Safety Tips for Toys

  • Walkers: Avoid them, as they are associated with high chances of head injuries.
  • Choking hazard: Do not buy small toys or toys with detachable parts less than a one rupee coin for children less than 3 years .Never give young children small balls, balloons – as a baby might swallow them or choke on them while playing with them.
  • Magnetic toys: Keep magnetic toys with powerful magnets, away from children under six years.
  • Toxic Chemicals: Avoid toys made of PVC plastic and lead painted wooden toys when buying a wooden toy specifically ask if the paint on it has lead in it.
  • Noise: Children’s ears are sensitive. If a toy makes sounds loud for your ear then it is probably too loud for your child.
  • Strangulation Hazard: Strings, plastic bags and ropes can get entangled around your child’s neck.

Around the house

  • Put rubber mats to prevent slipping. Check the furniture is stable. Keep heavy object such as books , electrical items, coins, house hold things,  etc keep in a safe place. Keep the house clean it prevent infections.
  • In The Kitchen, in lower cupboard contain non- breakable things and plastic items. Keep sharp items like knife, scissors  etc keep in upper cupboard .Keep the place clean . Don’t allow baby to come inside kitchen. Close the kitchen door always.
  • In The Bathroom, all beauty products ,cleaning products like floor cleaner, soap powder, toilet cleaner, soap, shampoo  etc keep in a lockable cupboard where baby hand not reach. Keep your bathroom clean. Close the bathroom door always.

Safety and Discipline

  • Around 9 months your baby will be naturally curious and will be moving quickly. When your see your child approaching a bad situation, remove him from the situation and say NO’ firmly. He may not yet be able to developmentally mind his parents and my repeat the act. This is not disobedience just natural curiosity and exploration. Do not punish your child, rather encourage his independence and exploration by providing a safe home.
  • No matter how safe your house is, children this age need constant watching unless they are in playpen or a crib.
  • They are prone to falling injuries. Use gates at stairs .Remove all sharp edged objects like glass –table and breakable objects from the ground.
  • Be sure crib mattresses are as low as possible. If the crib railing comes to children’s chest level, there are chance of your child falling from it.
  • Do not use table cloths, as children may grab these to pull themselves up, in turn risking falling of heavy or hot objects placed on them.
  • Put medicines and poisonous items like detergents, toilet cleaners etc. In high or locked up places.
  • Cover all electrical outlets and do not leave mobile charges etc. Hanging from them.
  • Turn the handles of pots and skillets away from stove edge .Keep the gas cylinder switched off when not in use.
  • Never leave your child alone in the bathtub, pool or bucket of water.

Baby Safety [crib or bed]

Providing a safe environment is an important part of caring for your new baby. Babies need to be safe at home and when they’re away from home. There are some simple things you can do to help keep your baby safe and secure. Always consult your healthcare professional if you have concerns about your baby.       

Good sleeping habits are important for your babies physical and emotional well beings. Babies under one year of age should sleep on their backs in their own cribs.

Baby Sleeping Safety.

  • All infants should be put down for sleep on their backs to reduce the risk for sudden Infant Death Syndrome, also called SIDS. Give your baby a pacifier before he goes to sleep. … Avoid soft bedding that might suffocate your baby, such as pillows, blankets, plush toys, and bumpers in the crib.
  • When you buy a crib, it comes with those ominous words: “Some Assembly Required.” Follow the instruction manual carefully, and make sure the hardware is tightened properly and that there are no sharp edges. After you start using it, check the crib periodically to make sure nothing has come loose.

To read more on Baby care, click on the link below,
New Born

Parenthood Essentials and must haves
for your NEW BORN

Entering a blissful journey of parenthood does not comes that easy and poses various challenges.
Here we bring you some prerequisites which can guide you to various parenthood essentials.

Baby Care

The day newborn comes to your home , life as you know it changes forever. Welcome to the baby care zone , which can guide you for baby care needs.

Essentials

Parenthood is a step by step learning ,which helps your baby to be happy and healthy-Come let’s check out some baby essentials which you must know

Health Issues

There are various gruesome diseases which can make your little one suffer. Lets try to know these diseases and remedies to get rid of them.

SAFE SUMMERS

Best Ways To Protect Oneself From Heat

Summer is a time to enjoy outdoor activities and eat
a variety of foods such as ice-cream and cool drinks. But this weather
poses challenges and can result in various health concerns. To have
a happy and safe summer, one needs to be extra careful to prevent
the hazardous effects of the weather. Here’s a list of some methods which
will help you stay cool and safe this summer.

Safe Summers

Safe Summers by Famhealth

Best Ways To Protect Yourself From Heat

Summer is a time to enjoy outdoor activities and eat a variety of foods such as ice-cream and cool drinks. But this weather poses challenges and can result in various health concerns. To have a happy and safe summer, one needs to be extra careful to prevent the hazardous effects of the weather. Here’s a list of some methods which will help you stay cool and safe this summer.

Stay away from heat during peak heat hours and protect yourself.

Try to stay inside especially from noon to around 3 pm, when the sun’s rays are directly perpendicular. If you have to go out cover your eyes and wear wide brimmed hats to protect yourself. Try to wear loose fitted clothes and protect yourself from getting exposed to direct sun and use sunscreen with a high SPF content whenever possible.

According to the Centers for Disease Control and Prevention (CDC) using air conditioners at home is the best way to protect oneself from heat-related illnesses.

Hydrate yourself

Dehydration can lead to various problems such as heat stroke. It is extremely essential to keep oneself hydrated, so keep on drinking water and liquids all around the day to keep yourself hydrated. A good amount of water is lost during perspiration; hence to compensate the lost water one must drink at least 7-8 glasses of water each day. It is also good to consume fruits and vegetables high in water content such as watermelons.

If you are dehydrated, you may experience below signs and symptoms:

  • Excessive thirst
  • Dry mouth
  • Headache
  • Cramping in muscles
  • Confusion

The best way to prevent dehydration is to slowly start consuming water. However, one must be careful not to guzzle an entire glass at an instance, as it might add an extra load to the stomach. Alcohol should be avoided, as it leaves the body dehydrated.

Be extra vigilant, if you suffer from below problems:

Heat cramps

Dehydration can lead to painful muscle cramps in legs and abdomen. Start massaging the cramped area and start rehydrating your body by slowly consuming water.

Heat exhaustion

Heat exhaustion is a serious condition which happens due to an extreme exposure to hot weather conditions. Usually, such individuals perspire heavily and their skin turns cold and clammy. It’s important to immediately shift the affected person to an air-conditioned environment. Rehydrating the person slowly with the water is essential to reverse heat exhaustion.

Heatstroke (or sunstroke)

Long hours of exposure or extreme physical exertion under the summer sun can lead to an extremely dangerous condition known as heat stroke. Unlike with heat exhaustion, people experiencing heatstroke have hot dry skin and a high body temperature — and they often have stopped sweating.

Sun and skin cancer

Sun rays have ultra violet light, which is extremely dangerous to the skin; exposure can result in skin tanning and ultimately can lead to skin cancer. Extreme exposure to sun can also cause sunburn, eye damage, and premature wrinkles.

It is important to cover oneself with proper clothing; broad-spectrum sunscreen with a sun protection factor (SPF) of 30 or higher and staying indoors  can also help one from the damage caused to skin.

How to choose a good sunscreen to protect your skin?

According to US Food and Drug Administration regulations require labels to follow certain guidelines. Below are certain labels which should be present, while you are choosing a sunscreen for yourself:

  • Choose a sunscreen with “broad-spectrum” protection. A broad spectrum sunscreen means it should protect against both UVA and UVB radiations. UVB radiations cause sunburns and most of the sunscreen protect against it. But, UVA radiations cause skin cancer and ageing. Hence, a broad spectrum sunscreen should only be used.
  • Choose sunscreen with SPF 30 or higher. Sunscreen with higher SPF not only protects for a longer period of time, but also has the capacity to filter higher percentage of UV rays. Example: SPF 15 sunscreens filter out about 93% of UVB rays, while SPF 30 sunscreens filter out about 97%; SPF 50 sunscreens filter about 98%, and SPF 100 filter about 99%. According to FDA sunscreens with SPF 15 or lesser protect only against sun burns not against the skin cancers.
  • While choosing sunscreen you must be carefully observe that “Water resistant” does not mean “waterproof.” No sunscreens are waterproof or “sweat proof”. It is advisable to reapply sunscreen after every 2 hours.

Protect yourself from viral diseases-cold, flu and viral fever

During the summer, the body weakens and becomes susceptible to viral infections. You can take some preventive steps to protect yourself against infections. Below are few steps which you can take:

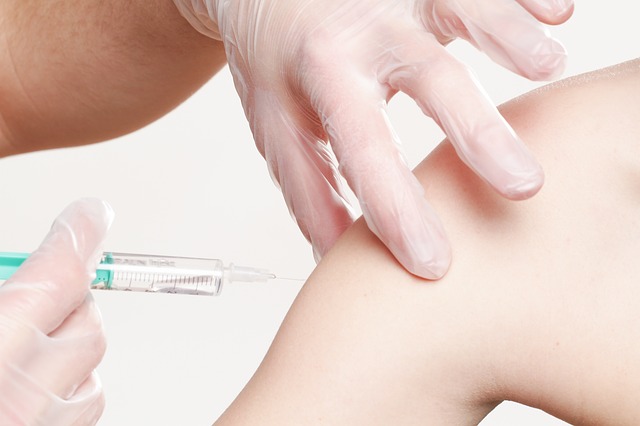
  • Ask your doctor if you can have a flu vaccination.
  • Wash your hands regularly and keep your surroundings clean.
  • Consume antioxidant rich foods, foods with lots of vitamins and minerals to strengthen your immune system.
  • Exercise regularly to keep your immune system fight against infection.

Protect yourself from mosquito borne diseases

Indian summers harbor mosquitoes, especially during the monsoons. Mosquito-borne diseases result primarily due to viruses, bacteria or parasites and are transmitted by mosquito bite. To protect yourself from dangerous diseases like malaria, dengue take below mentioned preventive steps:

  • Use a mosquito repellent
  • Plan your day outdoor activities when mosquitoes are less active
  • Wear full covered clothes
  • Avoid standing water
  • Use a mosquito net
  • Keep the air circulated by using fans. It will make mosquitoes difficult to fly near you

Water-borne illnesses

Summers also harbor many water-borne illnesses like Jaundice, cholera and diahrrea. To protect from those infections follow some below mentioned steps by:

  • Practicing good sanitation methods.
  • Drinking boiled or chemically treated water
  • Avoid contaminated foods such as street foods
  • Food consumed should be properly cooked, as these viruses are heat prone and get killed easily with boiling and heating.
  • Avoid raw vegetables and fruits that cannot be peeled
  • When you eat raw fruit or vegetables that can be peeled, peel them yourself.
  • Wash your hands properly before consuming food.

Post Transplant Surgery Care

Post Transplant Surgery Care by Famhealth

After transplant, your decisions and dedication to your own self-care at home will be vital to your health and the success of your transplant. The following life style changes are advised .To have the best outcome as a transplant recipient.

  • Know all your medications: doses, times and why you are taking them and what to avoid while taking medications.
  • Follow your medication schedule daily and make changes only as ordered by your transplant physician.
  • Maintain routine contact with your transplant team through your transplant coordinator.
  • Attend follow-up appointments and/or transplant clinic as instructed.
  • Have blood tests drawn routinely as required.
  • Monitor your weight, blood pressure, and temperature as required.
  • Maintain a healthy lifestyle that includes a balanced diet, regular exercise, and routine check-ups.
  • Avoid smoking and drinking as it increase the chances of malignancies and vascular diseases (heart attacks and strokes)
  • If planning for a trip to abroad that requires immunization, you should ask the transplant team. Always carry the latest medical prescription and medicines.

Avoid infection by taking the following precautions.

  • Wash hands often and Stay away from people with colds or other infections.
  • If the patient has a wound and must change his own dressing, wash hands before and after.
  • Avoid handling animal waste and avoid contact with animals who roam outside.
  • Avoid working in the soil for 6 months after the transplant. Thereafter, wear gloves.

To read more on Patient Care, click on the link below.

Patient Care

Bee Stings/ Insect Bite

Bee Stings/ Insect Bite by Famhealth

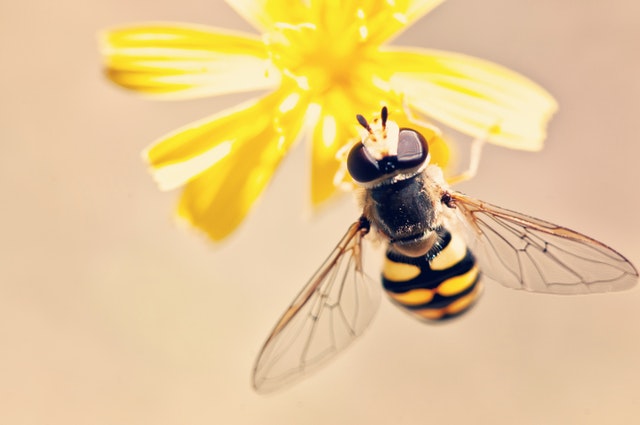
Not all bites or stings are the same. You will need different first aid treatment and medical care depending on what type of creature has bitten or stung you. Some species can cause more damage than others. Some people also have allergies that raise the risk of a serious reaction. Here’s how to recognize and treat the symptoms of bites and stings from insects, spiders, and snakes.

Common Symptoms

The common symptoms are redness, swelling of face, lips or throat, pain, itching, hives, abdominal cramps, nausea and vomiting, breathing problems and shock.

First aid treatment

If someone shows signs of a severe allergic reaction, help them get emergency medical attention and follow the steps in the next section. If they show no signs of a severe reaction, treat the site of the bite or sting for minor symptoms:

Step 1:

If the insect’s stinger is still embedded in their skin, remove it by gently scraping a flat-edged object, such as a credit card, across their skin. Avoid using tweezers to remove the stinger, since squeezing it may release more venom.

Step 2:

Wash the area of the bite with soap and water.

Step 3:

Place a cold compress or ice pack on the area for about 10 minutes at a time to help reduce pain and swelling. Wrap any ice or ice packs in a clean cloth to protect their skin.

Step 4:

Apply calamine lotion or a paste of baking soda and water to the area several times a day to help relieve itching and pain. Calamine lotion is a type of antihistamine cream.

Emergency treatment for a severe allergic reaction

If you suspect someone may be having a severe allergic reaction:

  • Ask someone else to call emergency services, right away. If you’re alone, contact emergency services before you provide other treatment.
  • Ask the person whether they carry an epinephrine auto-injector. If they do, retrieve it for them and help them use it according to the label directions.
  • Encourage them to remain calm, lie down quietly with their legs elevated, and stay still. If they start to vomit, turn them onto their side to allow the vomit to drain and prevent choking.
  • If they become unconscious and stop breathing, begin CPR. Continue it until medical help arrives.

To avoid making matters worse, don’t apply a tourniquet. You should also avoid giving them anything to eat or drink.

To read more on First Aid, click on the link below.

First Aid