Travelling with Baby

Travelling with Baby by Famhealth

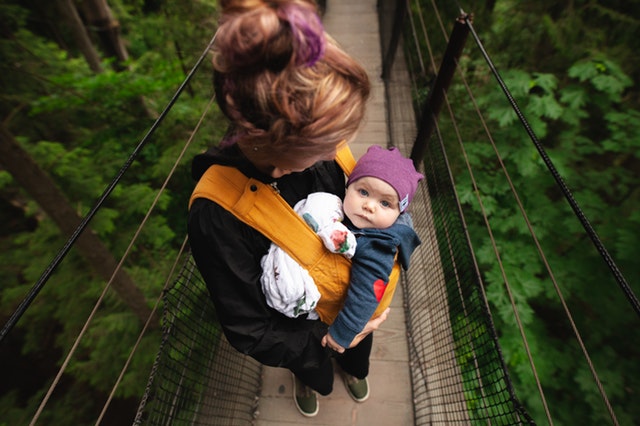
Little travelers need a surprising amount of stuff!

Here is a checklist of items that make traveling much easier.

Packing Checklist:

  • Diapers (carry extras incase of delay)
  • Pad/rubber sheet (to put under your baby during diaper changes)
  • Blankets 1 or 2 (cover your baby and cover yourself)
  • Plastic bags (Carry a variety of sizes for storing soiled diapers, clothes, and blankets.)
  • Diaper rash cream.
  • Wipes.
  • Sanitizer, baby wash, and baby lotion.
  • Tissues.
  • A few of your baby’s favorite toys.
  • Clothes, socks, and booties or shoes (One to two outfits per day is a good guideline.)
  • Washable bibs
  • Sun hat
  • Lightweight plastic feeding set with utensils, and baby food
    If your baby’s eating solid foods.
  • Sterilizer (if staying outside more than 1 day)
  • Formula, water, and juice if appropriate
  • Extra bottles, nipples, and sippy cups if appropriate
  • Energy-boosting snacks for you to munch on
  • Breast pump (if you use one)
  • Nightlight (So you can keep the room lighting soothingly low during middle-of-the-night diaper changes)
  • First-aid kit (Baby pain reliever and supplies for treating minor injuries, fever etc.)
  • Sling or front carrier
  • Portable crib or play yard – A safe place for your baby to sleep or play.
  • Inflatable baby bathtub (Can make bath time easier at your destination).
  • Car seat for safer travel by car or plane
  • Collapsible stroller (If you are using it).
     

Preparation techniques:

  • Start preparing to pack a few days before you travel. Keep a running list of things to take, or put items out on a table or dresser as you think of them.
  • Pack each of your baby’s outfits in its own zipped plastic bag so you don’t have to hunt around for tiny socks, shirts, and so on.
  • Take the phone number for your baby’s healthcare provider in case you have questions while you’re on the road.

To read more on Baby care, click on the link below,

New Born

Snake Bite

First Aid: Snake Bite by Famhealth

A snake bite is an injury caused by the bite of a snake, especially a venomous snake.

Symptoms

  • Visual of 2 puncture wounds
  • Redness
  • Swelling
  • Severe pain at the area
  • Vomiting
  • Trouble seeing
  • Tingling of the limbs

Treatment

  • Washing the wound with soap and water
  • Antivenom

Prevention

  • Protective footwear
  • Avoiding areas where snakes live
  • Not handling snakes

To read more on First Aid, click on the link below.

First Aid

First Aid for Dog Bite

First Aid for Dog Bite by Famhealth

A dog bite can lead to rabies or tetanus infection. Immediate medical care is required when the bite is from a dog that has, or might have, rabies.

Symptoms

Symptoms of infection include redness, swelling, increased pain and oozing. A doctor should look at these symptoms right away.

India accounts for 20,000 of the 45,000 deaths due to rabies every year. Over 95 percent of the time rabies virus being transmitted through dog bites.

Treatments

Always remember it’s very important to see a doctor, especially if an unfamiliar dog bit you, the bite is deep, you can’t stop the bleeding, or there are any signs of infection (redness, swelling, warmth, pus).

Treatment at home.

  • Place a clean towel over the injury to stop any bleeding.
  • Try to keep the injured area elevated.
  • Wash the bite carefully with soap and water.
  • Apply a sterile bandage to the wound.
  • Apply antibiotic ointment to the injury every day to prevent infection.

When you go to a doctor to treat the dog bite, be prepared for answering these questions:-

  • Do you know the owner of the dog?
  • If so, is the dog up to date on all vaccinations, including rabies?
  • Did the bite occur because the dog was provoked, or was the dog unprovoked?
  • What health conditions do you have? People with diabetes, liver disease, illnesses that suppress the immune system, and other health conditions may be at greater risk for a more severe infection.

Prevention

Steps to prevent dog bite.

  • When choosing a dog for a family pet, pick one with a good temperament.
  • Stay away from any dogs you don’t know.
  • Never leave young children alone with a dog — especially an unfamiliar one.
  • Don’t try to play with any dog that is eating or feeding her puppies.
  • Whenever you approach a dog, do so slowly, and give the dog the chance to approach you.
  • If a dog becomes aggressive, do not run away or scream. Stay calm, move slowly, and don’t make eye contact with the dog.

To read more on First Aid, click on the link below.

First Aid

First Aid for Resuscitation

First Aid for Resuscitation by Famhealth

Resuscitation is the process of correcting physiological disorders (such as lack of breathing or heartbeat) in an acutely unwell patient. It is an important part of intensive care medicine, trauma surgery and emergency medicine. Well known examples are : cardiopulmonary resuscitation and mouth-to-mouth resuscitation.

First aid kit contents and supplies checklist

  • Sterile dressings and plasters:
  • Plasters: Use plasters for small cuts and grazes.
  • Sterile pad: For more cushioning you can use a sterile pad and hold it in place with sticky tape. You could also use any clean, non-fluffy material, like a cloth scarf.
  • Sterile wound dressing: A sterile wound dressing is a sterile pad attached to a bandage. These are for larger wounds to apply pressure to help stop bleeding and are quick and easy to put on in an emergency.

Bandages:

  • Roller bandages: Roller bandages are long thin bandages rolled up. Use a roller bandage to support joint injuries, hold dressings in place, put pressure on wounds to stop bleeding, and to reduce swelling
  • Triangular bandages: Triangular bandages are large triangular shaped pieces of cloth. You can fold a triangular bandage to use as either a bandage or sling, or, if sterile, as a dressing for large wounds and burns.

Protective items:

  • Disposable gloves: Using disposable gloves reduces the risk of infection between you and someone you’re helping. If they’re available, always wear gloves whenever you dress wounds or deal with any body fluids or waste
  •  Face shields or pocket masks: These are designed to prevent infection when you give rescue breaths.

Other items:

  • Cleansing wipes, alcohol free wipes: To clean the skin around the wound
  • Gauze pads as dressings: To use as padding, or as swabs to clean around wounds
  • Sticky tape (adhesive tape): To hold dressings in place or to hold the loose end of bandages
  • Pins and clips: To fasten the loose end of bandages
  • Scissors, shears and tweezers: To cut sterile pads, bandages or sticky tape to the right length. You can also use them if you need to cut someone’s clothing, so that you can get to a wound, for example.

Useful extras:

  • Use kitchen film or clean plastic bags: To dress burns and scalds
  • Use alcohol gel: To clean your hands if you can’t find any water to use

For outdoors:

  • Use a blanket: To keep someone warm and protect them from the cold
  • Use survival bags: To keep someone warm and dry in an emergency
  • Use a torch: To help you see when it gets dark and to attract attention or make others aware that you’re there
  • Use a whistle: To help attract attention and get help

For the car, in case of road accidents:

  • Warning triangle: Put this on the road to warn other drivers to slow down
  • Wear a high visibility jacket: To make sure drivers can see you and reduce the risk of you getting hurt as well.

CPR with rescue breaths

Adults

  • Place the heel of your hand on the centre of the person’s chest, then place the other hand on top and press down by 5-6cm (2-2.5 inches) at a steady rate of 100 to 120 compressions per minute.
  • After every 30 chest compressions, give two rescue breaths.
  • Tilt the casualty’s head gently and lift the chin up with two fingers. Pinch the person’s nose. Seal your mouth over their mouth and blow steadily and firmly into their mouth for about one second. Check that their chest rises. Give two rescue breaths.
  • Continue with cycles of 30 chest compressions and two rescue breaths until they begin to recover or emergency help arrives.

Children over one year old

  • Open the child’s airway by placing one hand on the child’s forehead and gently tilting their head back and lifting the chin. Remove any visible obstructions from the mouth and nose.
  • Pinch their nose. Seal your mouth over their mouth and blow steadily and firmly into their mouth, checking that their chest rises. Give five initial rescue breaths.
  • Place the heel of one hand on the centre of their chest and push down by 5cm (about two inches), which is approximately one-third of the chest diameter. The quality (depth) of chest compressions is very important. Use two hands if you can’t achieve a depth of 5cm using one hand.
  • After every 30 chest compressions at a rate of 100 to 120 per minute, give two breaths.
  • Continue with cycles of 30 chest compressions and two rescue breaths until they begin to recover or emergency help arrives.

Infants under one year old

  • Open the infant’s airway by placing one hand on their forehead and gently tilting the head back and lifting the chin. Remove any visible obstructions from the mouth and nose.
  • Place your mouth over the mouth and nose of the infant and blow steadily and firmly into their mouth, checking that their chest rises. Give five initial rescue breaths.
  • Place two fingers in the middle of the chest and push down by 4cm (about 1.5 inches), which is approximately one-third of the chest diameter. The quality (depth) of chest compressions is very important. Use the heel of one hand if you can’t achieve a depth of 4cm using the tips of two fingers.
  • After 30 chest compressions at a rate of 100 to 120 per minute, give two rescue breaths.

Continue with cycles of 30 chest compressions and two rescue breaths until they begin to recover or emergency help arrives.  American Heart Association:

  • Untrained : If you’re not trained in CPR, then provide hands-only CPR. That means uninterrupted chest compressions of 100 to 120 a minute until paramedics arrive (described in more detail below). You don’t need to try rescue breathing.
  • Trained and ready to go : If you’re well-trained and confident in your ability, check to see if there is a pulse and breathing. If there is no breathing or a pulse within 10 seconds, begin chest compressions. Start CPR with 30 chest compressions before giving two rescue breaths.
  • Trained but rusty : If you’ve previously received CPR training but you’re not confident in your abilities, then just do chest compressions at a rate of 100 to 120 a minute. (Details described below.)

**The above advice applies to adults, children and infants needing CPR, but not newborns.

Before starting CPR, check:

  • Is the environment safe for the person?
  • Is the person conscious or unconscious?
  • If the person appears unconscious, tap or shake his or her shoulder and ask loudly, “Are you OK?”
  • If the person doesn’t respond and two people are available, one should call 911 or the local emergency number and get the AED, if one is available, and one should begin CPR.
  • If you are alone and have immediate access to a telephone, call 911 or your local emergency number, before beginning CPR. Get the AED, if one is available.
  • As soon as an AED is available, deliver one shock if instructed by the device, then begin CPR.

Remember to spell C-A-B

Compressions: Restore blood circulation

  • Put the person on his or her back on a firm surface.
  • Kneel next to the person’s neck and shoulders.
  • Place the heel of one hand over the center of the person’s chest, between the nipples. Place your other hand on top of the first hand. Keep your elbows straight and position your shoulders directly above your hands.
  • Use your upper body weight (not just your arms) as you push straight down on (compress) the chest at least 2 inches (approximately 5 centimeters) but not greater than 2.4 inches (approximately 6 centimeters). Push hard at a rate of 100 to 120 compressions a minute.
  • If you haven’t been trained in CPR, continue chest compressions until there are signs of movement or until emergency medical personnel take over. If you have been trained in CPR, go on to opening the airway and rescue breathing.

Airway: Open the airway

If you’re trained in CPR and you’ve performed 30 chest compressions, open the person’s airway using the head-tilt, chin-lift maneuver. Put your palm on the person’s forehead and gently tilt the head back. Then with the other hand, gently lift the chin forward to open the airway.

Breathing: Breathe for the person

Rescue breathing can be mouth-to-mouth breathing or mouth-to-nose breathing if the mouth is seriously injured or can’t be opened.

  • With the airway open (using the head-tilt, chin-lift maneuver), pinch the nostrils shut for mouth-to-mouth breathing and cover the person’s mouth with yours, making a seal.
  • Prepare to give two rescue breaths. Give the first rescue breath — lasting one second — and watch to see if the chest rises. If it does rise, give the second breath. If the chest doesn’t rise, repeat the head-tilt, chin-lift maneuver and then give the second breath. Thirty chest compressions followed by two rescue breaths is considered one cycle. Be careful not to provide too many breaths or to breathe with too much force.
  • Resume chest compressions to restore circulation.
  • As soon as an automated external defibrillator (AED) is available, apply it and follow the prompts. Administer one shock, then resume CPR — starting with chest compressions — for two more minutes before administering a second shock. If you’re not trained to use an AED, a 911 or other emergency medical operator may be able to guide you in its use5.Continue CPR until there are signs of movement or emergency medical personnel take over.

To read more on First Aid, click on the link below.

First Aid

Burns

First Aid: Dealing with Burns by Famhealth

What are burns?

Burns are damage to skin and deeper tissue caused by contact with fire, heat, electricity, radiation, or caustic chemicals.

Burns are classified according to the depth and extent of the skin damage, in the following way.

  • First-degree burns: the skin is red, painful and very sensitive to touch. The damaged skin may be slightly moist from leakage of the fluid in the deeper layers of the skin.
  • Second-degree burns: the damage is deeper and blisters usually appear on the skin. The skin is still painful and sensitive.
  • Third-degree burns: the tissues in all layers of the skin are dead. Usually there are no blisters. The burned surface can appear normal, white, black (charred), or bright red from blood in the bottom of the wound. Damage to the sensory nerves in the skin can mean that third-degree burns may be quite painless as the burned skin lacks sensation to touch. A skin graft is usually necessary for significant areas of third-degree burns.

First aid for burns

The first thing to do is to limit the extent of the damage, and prevent the burn from becoming worse.

  • Taking care that you do not put yourself at risk from the cause of the burns, move the person away from the danger area. Smother flames with a blanket or douse the person with water but beware of electricity or caustic chemicals.
  • Remove clothing or jewellery from the burned area but don’t try to peel back any clothing that is stuck to the skin.
  • The burnt area must be cooled by being placed under tepid running water. The water should not be unpleasantly cold.
  • Keep the damaged area under running water for at least one hour, or longer if the pain has not stopped. Up to four hours of this treatment can be beneficial. However, in severe burns it is more important to get the person to hospital for treatment, so don’t let this delay calling the ambulance.
  • Meanwhile keep the person warm a lot of heat can be lost from large burns so put a blanket or clothing around the non-injured areas.
  • First-degree burns, eg mild sunburn, may not require this treatment although it may help to soothe discomfort.
  • Put cling film or a plastic bag over the burn before moving the person to hospital, but don’t wrap the cling film tightly round a limb.
  • Do not put any creams on the burn at this stage, but you can give the person simple pain relief such as paracetamol.

What complications can occur?

  • When skin is burned, it loses its ability to protect, which increases the risk of infection. So it is important that the damaged area be thoroughly cleansed within the first six hours and that the area is kept clean while it is healing.
  • If, after a few days, there are signs of an infection – ie the skin is becoming increasingly red, hot, and swollen, and the victim experiences a throbbing pain or feels generally unwell or has a fever – contact a doctor or your practice nurse.
  • Severe burns can cause scarring.
  • In cases of extensive severe burns, the body may lose large quantities of fluid. This can disturb the blood circulation and cause problems with the body’s salt balance. As a result the person may go into ‘shock’ with a low blood pressure and rapid pulse. Such injuries should be assessed at your local Accident and Emergency department.
  • Heat exhaustion and heatstroke can also occur if the body temperature rises too high (for example, after excessive exposure to hot sun, often with sunburn). Watch out for extreme tiredness, rapid pulse, headache, and confusion. Help the person to cool down in the shade, with tepid water to drink and get urgent medical help if you are worried.

What can be done to prevent burns?

Be fire-conscious in the home. The kitchen is the most dangerous room in the house, and the most likely place for burns and scalds to occur. If you have small children in the house, fit a safety gate to keep them out of the kitchen.

When cooking, keep small children away from hot drinks, pans and kettles, barbecues and other open flames. Always put pans to the back of the hob if possible and turn handles to the back away from where small hands might reach.

Never throw water over oil fires, such as in a chip pan, because this will cause a fire explosion that can have severe consequences. Instead the fire should be smothered by covering the pan with a damp cloth.

Buy a proper fire-smothering blanket and keep it somewhere in the kitchen where it is easily accessible.

Hot water in the bathroom is another risk – so when there are small children in the house, fill baths by running the cold tap first. Fit a mixer to the taps and never leave a child alone in or near the bath.

Always used a fixed guard around open fires in the house.

Bonfires and camp fires are another cause of serious burns.

Never light them by throwing petrol and a lighted match at them. Behave responsibly around them and keep young children well away.

It’s become a popular game among young people at music festivals to throw gas cyclinders from barbeques into the camp fires.

This is extremely dangerous and has resulted in some very serious burn injuries, sometimes among innocent bystanders.

Festival goers should be warned against this behaviour.

Take standard advice to protect yourself from sunburn – Slip, Slop, Slap!

Slip on baggy clothing such as an oversized T shirt, slop on suncream and slap on a hat.

Keep children in the shade especially in intense sun in the middle of the day, and frequently reapply high sun protection factor (SPF) suncream especially if they are in and out of the swimming pool

To read more on First Aid, click on the link below.

First Aid

First Aid for Drowning

First Aid for Drowning by Famhealth

Get Help

  • Notify a lifeguard, if one is close. If not, ask someone to call 102 ,108.
  • If you are alone, follow the steps below.

Move the Person

  • Take the person out of the water.

Check for Breathing

  • Place your ear next to the person’s mouth and nose. Do you feel air on your cheek?
  • Look to see if the person’s chest is moving.

If the Person is Not Breathing, Check Pulse

  • Check the person’s pulse for 10 seconds.

If There is No Pulse, Start CPR

  • Carefully place person on back.
  • For an adult or child, place the heel of one hand on the center of the chest at the nipple line. You can also push with one hand on top of the other. For an infant, place two fingers on the breastbone.
  • For an adult or child, press down at least 2 inches. Make sure not to press on ribs. For an infant, press down about 1 and 1/2 inches. Make sure not to press on the end of the breastbone.
  • Do chest compressions only, at the rate of 100-120 per minute or more. Let the chest rise completely between pushes.
  • Check to see if the person has started breathing.

Repeat if Person Is Still Not Breathing

  • If you’ve been trained in CPR, you can now open the airway by tilting the head back and lifting the chin.
  • Pinch the nose of the victim closed. Take a normal breath, cover the victim’s mouth with yours to create an airtight seal, and then give 2 one-second breaths as you watch for the chest to rise.
  • Give 2 breaths followed by 30 chest compressions.

Mouth-to-mouth resuscitation for a drowning victim :

  • Turn the drowning person’s head to the side, allowing any water to drain from his or her mouth and nose. Turn the head back to the center.
  • Begin mouth-to-mouth resuscitation on land, if possible, or in the water if the injured person needs immediate life-and-death measures.
  • Strongly breathe four times into the mouth of the injured person as you pinch his or her nose. This helps air get past any water that is clogging the breathing passageways and the lungs.
  • After four strong breaths, put your ear near the mouth and watch the chest for any breathing movement.
  1. Check the pulse for signs of life.
  2. Repeat the cycle.

***You’re not out of the water once the drowning victim starts to breathe and choke. In fact, the first 48 hours after a drowning incident can be the most dangerous. Complications resulting from water exposure—pneumonia, infection, heart failure—can all occur during this time. Therefore, you should always take a drowning victim to the hospital.

To read more on First Aid, click on the link below.

https://famhealth.in/infocus-detail/first-aid


Hot or Cold Compress for Injuries

Hot or Cold Compress for Injuries by Famhealth

There is so much confusion about this issue because therapeutic icing and heating — cryotherapy and thermotherapy — are rational, cheap, easy, safe self-treatment options for many common painful problems.

Ice is for fresh injuries, and heat is for stiff, aching muscles.

Ice is for injuries — calming down damaged superficial tissues that are inflamed, red, hot, swollen, pain or if it is bleeding/ post surgical pain. The inflammatory process is a healthy, normal, natural process; that also happens to be incredibly painful and more biologically stubborn than it needs to be. Icing is mostly just a mild, drugless way of dulling the pain of inflammation and taking swelling down a bit. Examples: a freshly pulled muscle.

Heat is for muscles, chronic pain, and stress — taking the edge off symptoms like muscle aching and stiffness, which have many unclear causes, but trigger points are probably one of the usual suspects. Chronic pain, especially back pain, often involves lots of tension, anxiety, hyper vigilance, and sensitization, and comfortable heat can soothe a jangled mind and nervous system. Stress and fear are major factors in many painful problems, of course.

Alternating between applications of ice and heat is called contrasting therapy. It’s extremely stimulating and is mostly used to facilitate injury recovery, with unknown efficacy.

What ice and heat are not for

Both ice and heat have the potential to do some minor, temporary harm when used poorly. Heat can make inflammation significantly worse. Ice can aggravate symptoms of tightness and stiffness; it can also just make any pain worse when it’s unwanted.

Both ice and heat are pointless or worse when unwanted: icing when you’re already shivering, or heating when you’re already sweating. The brain may interpret an excess of either one as a threat, but icing is more threatening and when brains think there’s a threat, they may also amp up the pain. Ice seems to be feel more threatening to most people.

Trigger points (painfully sensitive spots) can be surprisingly intense and easily mistaken for “iceable” injury and inflammation. But if you ice trigger points, they may burn and ache even more acutely. This mistake is made particularly often with low back pain and neck pain — the very conditions people often try to treat with ice.

Heat and inflammation are the other particularly bad combination.

How to use Ice

After an acute injury, such as an ankle sprain, or after activities that aggravate a chronic injury, such as shin splints.

Use an ice bag with cubed ice, ice pack or ice massage. When using an ice pack that does not have real ice cubes,use a thin towel between the ice pack and the skin to prevent frostbite.

Do not use ice longer than 20 minutes at a time. More time spent icing does not mean more relief. Be sure the area goes numb, then make sure the skin returns completely back to normal before reapplying.

How to apply heat

Before activities that aggravate​ chronic injuries, such as muscle strains. Heat can help loosen tissues and relax injured areas.

Apply heat using a heating pad or a hot wet towel.

No more than 20 minutes at a time. Never apply heat while sleeping. Be careful not to burn yourself.

To read more on First Aid, click on the link below.

First Aid

How to Remove Water from your Ear

How to Remove Water from your Ear by Famhealth

If water does get trapped in your ear, you can try several at-home remedies for relief:

Jiggle your earlobe

This first method may shake the water out of your ear right away. Gently tug or jiggle your earlobe while tilting your head in a downward motion toward your shoulder. You can also try shaking your head from side to side while in this position.

Make gravity do the work

With this technique, gravity should help the water drain from your ear.Lie on your side for a few minutes, with your head on a towel to absorb the water. The water may slowly drain out of your ear.

Create a vacuum

This method will create a vacuum that may draw the water out.

  • Tilt your head sideways, and rest your ear onto your cupped palm, creating a tight seal.
  • Gently push your hand back and forth toward your ear in a rapid motion, flattening it as you push and cupping it as you pull away.
  • Tilt your head down to allow the water to drain.

Apply a hot compress

  • Using hot but not scalding water, wet a washcloth. Make sure to wring out the washcloth before using it so that it doesn’t drip.
  • Tilt head downward on the affected side and apply the cloth to the outside of the ear. Leave it on the ear for about 30 seconds, and then remove it for a minute.
  • Repeat these steps four or five times. It may help to sit up or lie down on the side opposite of the affected side of your body afterward.

Use a blow dryer

The heat from the dryer can help evaporate the water inside the ear canal.

  • Set the blow dryer to its lowest setting.
  • Hold the hair dryer about a foot away from the ear and move it in a back-and-forth motion.
  • While tugging down on the earlobe, let the warm air blow into the ear.

Try alcohol and vinegar eardrops

The alcohol can help evaporate the water in your ear. Alcohol also works to eliminate the growth of bacteria, which can help prevent infection. If the trapped water occurs due to earwax buildup, the vinegar may help remove it.

  • Combine equal parts alcohol and vinegar to make eardrops.
  • Using a sterile dropper, apply three or four drops of this mixture into the ear.
  • Gently rub the outside of the ear.
  • Wait 30 seconds, and tilt the head sideways to let the solution drain out.

Use hydrogen peroxide eardrops

Hydrogen peroxide can help clear debris, earwax, bacteria, or trapped water from your ear.

  • Using a clean dropper, place three to four drops of hydrogen peroxide into your ear.
  • Wait two to three minutes.
  • Tilt the affected side downward, allowing the fluid to drain out.

Don’t use this method if you think you have any of these conditions:

  • an outer ear infection, perforated eardrum and eardrum tubes.

Try olive oil

Olive oil can also help prevent ear infection, as well as repel water out.

  • Warm some olive oil in a small bowl.
  • Using a clean dropper, place a few drops of the oil into the affected ear.
  • Lie on the  other side for about 10 minutes, and then sit up and tilt the ear downward. The water and oil should drain out.

Yawn or chew

When water gets stuck, moving your mouth can sometimes help to open the tubes. Yawn or chew gum to relieve tension in your Eustachian tubes.

Perform the Valsalva maneuver

This method can also help open closed eustachian tubes. Be careful not to blow too hard. This can damage your ear drum.

  • Close your mouth and gently squeeze your nostrils shut with your fingers.
  • Breathe deeply, and slowly blow the air out of the nose. If popping sound noticed,  it means the Eustachian tubes have opened.
  • Tilt your head to allow the water to drain from your ear.

Use steam

Warm steam can help release water from your middle ear through your eustachian tubes. Try taking a hot shower, or giving yourself a mini sauna with a bowl of hot water.

  • Fill a large bowl with hot steaming water.
  • Cover your head with a towel to keep the steam in, and hold your face over the bowl.
  • Inhale the steam for 5 or 10 minutes, and then tilt your head to the side to drain your ear.
  • 12. Try more water

This technique may sound illogical, but it can actually help draw water out of your ear.

  • Lying on your side, fill the affected ear with water using a clean dropper.
  • Wait five seconds and then turn over, with the affected ear facing down. All of the water should drain out.

To read more on First Aid, click on the link below.

First Aid

First Aid for Thorns and Glass

First Aid for Thorns and Glass by Famhealth

Stop the Bleeding

  • Apply direct pressure on the area.

Clean and Protect

  • Clean the area with warm water and gentle soap.
  • Use tweezers cleaned with rubbing alcohol to remove the object.
  • If the object is under the surface of the skin, sterilize a clean, sharp needle by wiping it with rubbing alcohol. Use the needle to gently lift or break the skin over the object. Lift the tip of the object out and grasp it with your tweezers.
  • Squeeze the wound gently to allow bleeding to wash out germs.
  • Apply an antibiotic ointment to reduce chance of infection.
  • Put a sterile bandage on the area.

Follow Up

  • For a minor cut, remove bandage after a couple of days to promote healing.
  • See a health care provider if the cut doesn’t heal or shows signs of infection, including redness, swelling, pus, or excessive pain.
  • Having said all this do not forget to take TETANUS immunization BY DOCTOR.

To read more on First Aid, click on the link below.

First Aid

First Aid for Fractures

First Aid for Fracture by Famhealth

Fracturehappens when one of our bones becomes cracked or broken into multiple pieces. It can result from a sports injury, accident, or violent trauma.

Fractures usually aren’t life threatening, but they do require immediate medical care.  We should learn how to recognize the symptoms of a broken bone, provide first-aid treatment, and get professional help if needed.

Symptoms:

Fractures can cause one or more of the following signs and symptoms:

  • intense pain in the injured area that gets worse when you move it
  • numbness in the injured area
  • bluish color, swelling, or visible deformity in the injured area
  • bone protruding through the skin
  • heavy bleeding at the injury site

How to provide first aid for  fractures:

If it is suspected that someone has a broken bone, provide first-aid treatment and help them get professional care:

  • Stop any bleeding: If they’re bleeding, elevate and apply pressure to the wound using a sterile bandage, a clean cloth, or a clean piece of clothing.
  • Immobilize the injured area: If you suspect they’ve broken a bone in their neck or back, help them stay as still as possible. If you suspect they’ve broken a bone in one of their limbs, immobilize the area using a splint or sling.
  • Apply cold to the area: Wrap an ice pack or bag of ice cubes in a piece of cloth and apply it to the injured area for up to 10 minutes at a time to reduce swelling and pain.
  • Treat them for shock: Help them get into a comfortable position, encourage them to rest, and reassure them. Cover them with a blanket or clothing to keep them warm.
  • Get professional help: Call ambulance or help them get to the emergency department for professional care.You can summon professional help if you notice following things:

              — You suspect they’ve broken a bone in their head, neck, or back

              –The fractured bone has pushed through their skin

              –They’re bleeding heavily .

If the person is not breathing we can start giving CPR or help them get to the emergency department by car or other means so a doctor can diagnose their condition and recommend appropriate treatment.

To read more on First Aid, click on the link below.

First Aid