Involvement with your child is critical. These are some ways to form a bond and develop a close relationship with your child from an early start. Start off on the right path, make the commitment to spend time with your baby, and relax, you’re going to be a great dad.
Before baby arrives:
To attend antenatal classes with your partner and do some research of your own.
The baby arrives will allow them to get to know your voice which will help to comfort them once they arrived.
Thank everyone and anyone who helps you, whether they’ve offered or you have to ask them to
Get to know the bump! Reading, singing and talking to your partners bump even before baby arrives will allow them to get to know your voice which will then help to comfort them once they arrive.
Once baby arrives:
Wash your hands before touching baby or use hand rub.
Try to support your partner as much as possible by making a few meals.
Support your partner while breast feeding.
Make sure you get lot of skin to skin contact with Baby.
Should know the importance of breast feeding.
Support your partner to come out of night mares and night terrors.
Baby Care
Know baby hunger clues: chewing on fingers, smacking lips, rooting for breast, crying
Talk, sing, and play with baby
Keep cord and/or circumcision clean and dry
Call lactation consultant with breastfeeding problems
Take an infant CPR/First Aid class
Have a frustration action plan
Go to well-baby check-up appointments
You and your partner will be sleep deprived. Sleep in shifts
To read more on Baby care, click on the link below,
A dog bite can lead to rabies or tetanus infection. Immediate medical care is required when the bite is from a dog that has, or might have, rabies.
Symptoms
Symptoms of infection include redness, swelling, increased pain and oozing. A doctor should look at these symptoms right away.
India accounts for 20,000 of the 45,000 deaths due to rabies every year. Over 95 percent of the time rabies virus being transmitted through dog bites.
Treatments
Always remember it’s very important to see a doctor, especially if an unfamiliar dog bit you, the bite is deep, you can’t stop the bleeding, or there are any signs of infection (redness, swelling, warmth, pus).
Treatment at home.
Place a clean towel over the injury to stop any bleeding.
Try to keep the injured area elevated.
Wash the bite carefully with soap and water.
Apply a sterile bandage to the wound.
Apply antibiotic ointment to the injury every day to prevent infection.
When you go to a doctor to treat the dog bite, be prepared for answering these questions:-
Do you know the owner of the dog?
If so, is the dog up to date on all vaccinations, including rabies?
Did the bite occur because the dog was provoked, or was the dog unprovoked?
What health conditions do you have? People with diabetes, liver disease, illnesses that suppress the immune system, and other health conditions may be at greater risk for a more severe infection.
Prevention
Steps to prevent dog bite.
When choosing a dog for a family pet, pick one with a good temperament.
Stay away from any dogs you don’t know.
Never leave young children alone with a dog — especially an unfamiliar one.
Don’t try to play with any dog that is eating or feeding her puppies.
Whenever you approach a dog, do so slowly, and give the dog the chance to approach you.
If a dog becomes aggressive, do not run away or scream. Stay calm, move slowly, and don’t make eye contact with the dog.
To read more on First Aid, click on the link below.
Not all bites or stings are the same. You will need different first aid treatment and medical care depending on what type of creature has bitten or stung you. Some species can cause more damage than others. Some people also have allergies that raise the risk of a serious reaction. Here’s how to recognize and treat the symptoms of bites and stings from insects, spiders, and snakes.
Common Symptoms
The common symptoms are redness, swelling of face, lips or throat, pain, itching, hives, abdominal cramps, nausea and vomiting, breathing problems and shock.
First aid treatment
If someone shows signs of a severe allergic reaction, help them get emergency medical attention and follow the steps in the next section. If they show no signs of a severe reaction, treat the site of the bite or sting for minor symptoms:
Step 1:
If the insect’s stinger is still embedded in their skin, remove it by gently scraping a flat-edged object, such as a credit card, across their skin. Avoid using tweezers to remove the stinger, since squeezing it may release more venom.
Step 2:
Wash the area of the bite with soap and water.
Step 3:
Place a cold compress or ice pack on the area for about 10 minutes at a time to help reduce pain and swelling. Wrap any ice or ice packs in a clean cloth to protect their skin.
Step 4:
Apply calamine lotion or a paste of baking soda and water to the area several times a day to help relieve itching and pain. Calamine lotion is a type of antihistamine cream.
Emergency treatment for a severe allergic reaction
If you suspect someone may be having a severe allergic reaction:
Ask someone else to call emergency services, right away. If you’re alone, contact emergency services before you provide other treatment.
Ask the person whether they carry an epinephrine auto-injector. If they do, retrieve it for them and help them use it according to the label directions.
Encourage them to remain calm, lie down quietly with their legs elevated, and stay still. If they start to vomit, turn them onto their side to allow the vomit to drain and prevent choking.
If they become unconscious and stop breathing, begin CPR. Continue it until medical help arrives.
To avoid making matters worse, don’t apply a tourniquet. You should also avoid giving them anything to eat or drink.
To read more on First Aid, click on the link below.
Choking is a blockage of the upper airway/throat by food or other objects, which prevents a person from breathing effectively. Choking can cause a simple coughing fit, but complete blockage of the airway may lead to death.
Choking is a true medical emergency that requires fast, appropriate action by anyone available. Emergency medical teams may not arrive in time to save a choking person’s life.
In adults, choking most often occurs when food is not chewed properly. Talking or laughing while eating may cause a piece of food to “go down the wrong pipe.” Normal swallowing mechanisms may be slowed if a person has been drinking alcohol or taking drugs, and if the person has certain illnesses such as Parkinson’s disease.
Choking Symptoms
If an adult is choking, you may observe the following behaviours:
Coughing or gagging
Hand signals and panic (sometimes pointing to the throat)
Sudden inability to talk
Clutching the throat: The natural response to choking is to grab the throat with one or both hands. This is the universal choking sign and a way of telling people around you that you are choking.
Wheezing
Passing out
Turning blue: Cyanosis, a blue colouring to the skin, can be seen earliest around the face, lips, and fingernail beds. You may see this, but other critical choking signs would appear first.
If an infant is choking, more attention must be paid to an infant’s behaviour. They cannot be taught the universal choking sign.
Difficulty breathing
Weak cry, weak cough, or both
How to help someone who is choking?
Do not hesitate to call for emergency help if you believe a person is choking. Do not attempt to drive a choking person to a hospital emergency department.
What to do if a person is choking:
It is best not to do anything if the person is coughing forcefully and not turning a bluish colour. Ask, “Are you choking?” If the person is able to answer you by speaking, it is a partial airway obstruction. Stay with the person and encourage him or her to cough until the obstruction is cleared.
Do not give the person anything to drink because fluids may take up space needed for the passage of air
If the material is not yet removed, then follow Heimlich manever.
Heimlich maneuver steps
Comfort the victim. A person will start to panic when they are choking. Go to the victim and reassure them that you know the Heimlich manure and begin assistance. Let the sufferer know that he must remain calm, and should follow your instructions. Then get working!!
Have the choking victim stand. For the Heimlich maneuver to work successfully, the choking victim must be up on their feet. If the victim is unstable or panicking you can help support them
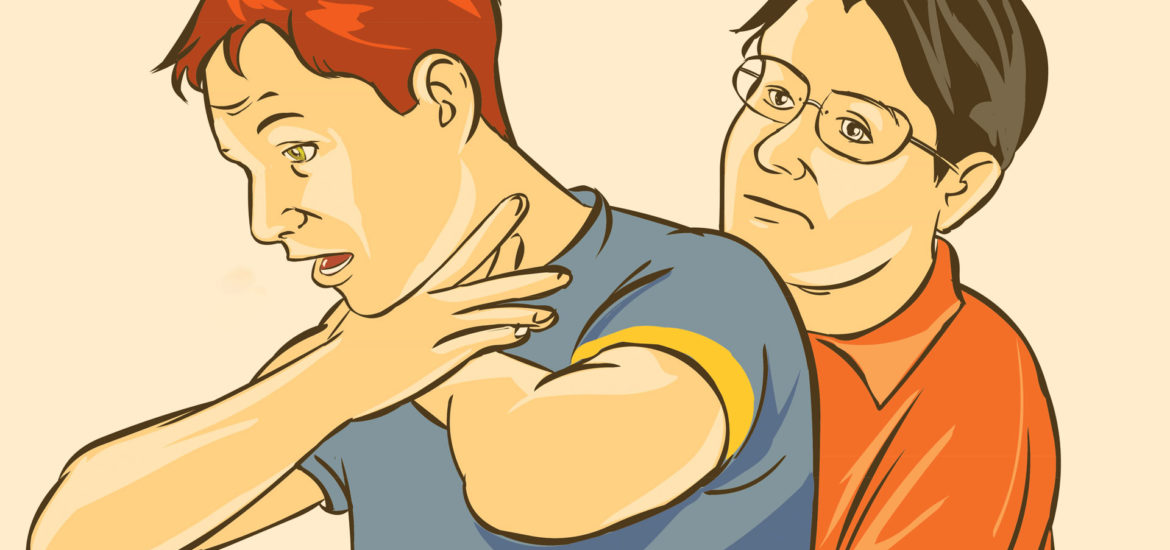
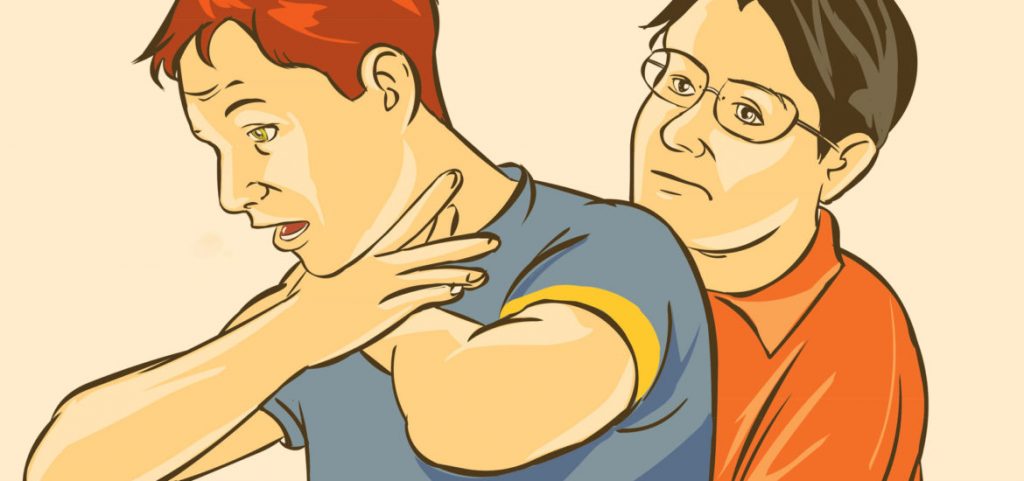
Get behind the person who is choking. For the next phase of the Heimlich maneuver you need to put yourself in the right position. Get behind the person who is choking.
Carefully hug the choking victim. Place your hands around the victim’s chest when you are standing behind the victim. The victim’s arms should be up and away from yours. You have to get a good hold on the person’s trunk.
Close your hand in a fist. As you are hugging from behind, put your hand exactly in the middle of the person’s chest in the form of a fist. Do not tuck your thumb into your hand; it needs to be on the outside, pointed up. Place your fist above the area of the navel (belly button). There is no time to be modest and it may be required that any heavy clothing worn by the victim be removed to find the proper first placement. Whatever needs to be done in order to keep the victim from choking to death must be done.
Take a hold of your fist. Create the perfect circle when you grab your fist with your free hand. Do not release your grip on your fist.
Begin to thrust. Hold your arms closely; with the one hand still closed tight, push inward and up in one motion. You need to thrust hard on the victim’s abdomen. To dislodge the object blocking the victim’s airways, do the strong fisted thrust five times squeezing stronger each time. A firm thrust will also bring air from the person’s airways, making them cough. To do it right, you have to go deep, although it may hurt the victim. Don’t let this worry you! He will always be thankful for your forceful methods when he can breathe once again. Keep doing this until the item they were choking on is expelled.
Through out the Heimlich maneuver, it is vital to keep a good hold of the victim in case becomes unconscious. If the maneuver is successful, sit the victim down again and don’t leave him until his breathing gets back to normal.
To read more on First Aid, click on the link below.
Fainting occurs when your brain temporarily doesn’t receive enough blood supply, causing you to lose consciousness. This loss of consciousness is usually brief.
If you feel faint
Lie down or sit down:-To reduce the chance of fainting again, don’t get up too quickly.
Place your head between your knees if you sit down.
If someone else faints
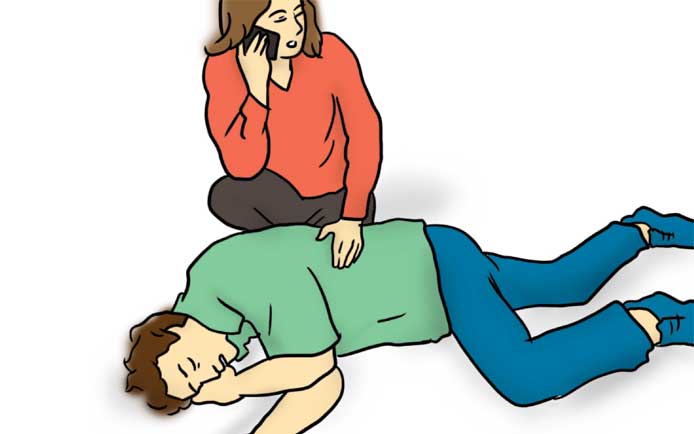
Position the person on his or her back. If there are no injuries and the person is breathing, raise the person’s legs above heart level — about 12 inches (30 centimeters) — if possible. Loosen belts, collars or other constrictive clothing.
To reduce the chance of fainting again, don’t get the person up too quickly. If the person doesn’t regain consciousness within one minute, call 108 or your local emergency number.
Check for pulse. Check for carotid pulse in neck for less than 10 second and at the same time watch for chest movements for breathing .In case of feeble pulse or no pulse , begin CPR. Call 108 or your local emergency number. Continue CPR until help arrives or the person begins to breathe.
If the person was injured in a fall associated with a faint, treat bumps, bruises or cuts appropriately. Control bleeding with direct pressure.
If Pulse is there check the blood glucose with a glucometer. If sugar is less immediately give sugar with water to drink (anything sugary is fine)
**** ONLY FOR AN CONSCIOUS PERSON ,IF UNCONSCIOUS TAKE THE VICTIM TO HOSPITAL.
To read more on First Aid, click on the link below.
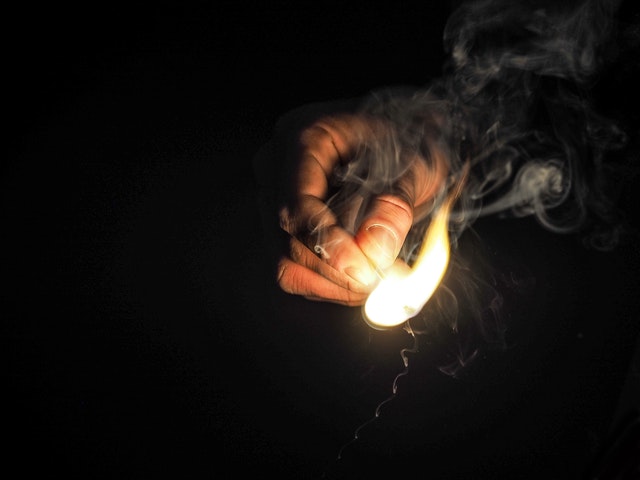
Burns are damage to skin and deeper tissue caused by contact with fire, heat, electricity, radiation, or caustic chemicals.
Burns are classified according to the depth and extent of the skin damage, in the following way.
First-degree burns: the skin is red, painful and very sensitive to touch. The damaged skin may be slightly moist from leakage of the fluid in the deeper layers of the skin.
Second-degree burns: the damage is deeper and blisters usually appear on the skin. The skin is still painful and sensitive.
Third-degree burns: the tissues in all layers of the skin are dead. Usually there are no blisters. The burned surface can appear normal, white, black (charred), or bright red from blood in the bottom of the wound. Damage to the sensory nerves in the skin can mean that third-degree burns may be quite painless as the burned skin lacks sensation to touch. A skin graft is usually necessary for significant areas of third-degree burns.
First aid for burns
The first thing to do is to limit the extent of the damage, and prevent the burn from becoming worse.
Taking care that you do not put yourself at risk from the cause of the burns, move the person away from the danger area. Smother flames with a blanket or douse the person with water but beware of electricity or caustic chemicals.
Remove clothing or jewellery from the burned area but don’t try to peel back any clothing that is stuck to the skin.
The burnt area must be cooled by being placed under tepid running water. The water should not be unpleasantly cold.
Keep the damaged area under running water for at least one hour, or longer if the pain has not stopped. Up to four hours of this treatment can be beneficial. However, in severe burns it is more important to get the person to hospital for treatment, so don’t let this delay calling the ambulance.
Meanwhile keep the person warm a lot of heat can be lost from large burns so put a blanket or clothing around the non-injured areas.
First-degree burns, eg mild sunburn, may not require this treatment although it may help to soothe discomfort.
Put cling film or a plastic bag over the burn before moving the person to hospital, but don’t wrap the cling film tightly round a limb.
Do not put any creams on the burn at this stage, but you can give the person simple pain relief such as paracetamol.
What complications can occur?
When skin is burned, it loses its ability to protect, which increases the risk of infection. So it is important that the damaged area be thoroughly cleansed within the first six hours and that the area is kept clean while it is healing.
If, after a few days, there are signs of an infection – ie the skin is becoming increasingly red, hot, and swollen, and the victim experiences a throbbing pain or feels generally unwell or has a fever – contact a doctor or your practice nurse.
Severe burns can cause scarring.
In cases of extensive severe burns, the body may lose large quantities of fluid. This can disturb the blood circulation and cause problems with the body’s salt balance. As a result the person may go into ‘shock’ with a low blood pressure and rapid pulse. Such injuries should be assessed at your local Accidentand Emergencydepartment.
Heat exhaustion and heatstroke can also occur if the body temperature rises too high (for example, after excessive exposure to hot sun, often with sunburn). Watch out for extreme tiredness, rapid pulse, headache, and confusion. Help the person to cool down in the shade, with tepid water to drink and get urgent medical help if you are worried.
What can be done to prevent burns?
Be fire-conscious in the home. The kitchen is the most dangerous room in the house, and the most likely place for burns and scalds to occur. If you have small children in the house, fit a safety gate to keep them out of the kitchen.
When cooking, keep small children away from hot drinks, pans and kettles, barbecues and other open flames. Always put pans to the back of the hob if possible and turn handles to the back away from where small hands might reach.
Never throw water over oil fires, such as in a chip pan, because this will cause a fire explosion that can have severe consequences. Instead the fire should be smothered by covering the pan with a damp cloth.
Buy a proper fire-smothering blanket and keep it somewhere in the kitchen where it is easily accessible.
Hot water in the bathroom is another risk – so when there are small children in the house, fill baths by running the cold tap first. Fit a mixer to the taps and never leave a child alone in or near the bath.
Always used a fixed guard around open fires in the house.
Bonfires and camp fires are another cause of serious burns.
Never light them by throwing petrol and a lighted match at them. Behave responsibly around them and keep young children well away.
It’s become a popular game among young people at music festivals to throw gas cyclinders from barbeques into the camp fires.
This is extremely dangerous and has resulted in some very serious burn injuries, sometimes among innocent bystanders.
Festival goers should be warned against this behaviour.
Take standard advice to protect yourself from sunburn – Slip, Slop, Slap!
Slip on baggy clothing such as an oversized T shirt, slop on suncream and slap on a hat.
Keep children in the shade especially in intense sun in the middle of the day, and frequently reapply high sun protection factor (SPF) suncream especially if they are in and out of the swimming pool
To read more on First Aid, click on the link below.
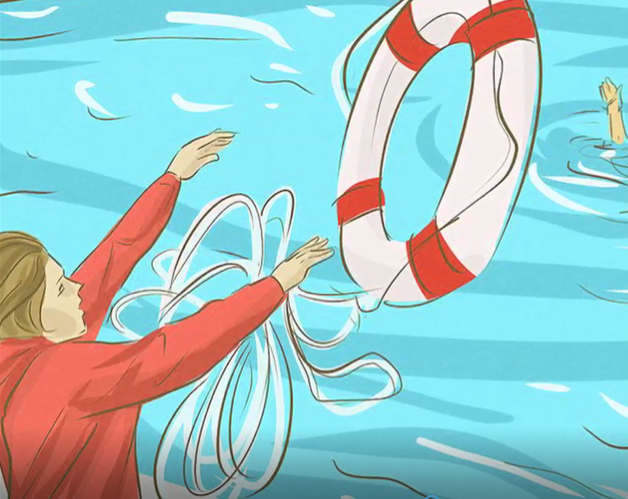
Notify a lifeguard, if one is close. If not, ask someone to call 102 ,108.
If you are alone, follow the steps below.
Move the Person
Take the person out of the water.
Check for Breathing
Place your ear next to the person’s mouth and nose. Do you feel air on your cheek?
Look to see if the person’s chest is moving.
If the Person is Not Breathing, Check Pulse
Check the person’s pulse for 10 seconds.
If There is No Pulse, Start CPR
Carefully place person on back.
For an adult or child, place the heel of one hand on the center of the chest at the nipple line. You can also push with one hand on top of the other. For an infant, place two fingers on the breastbone.
For an adult or child, press down at least 2 inches. Make sure not to press on ribs. For an infant, press down about 1 and 1/2 inches. Make sure not to press on the end of the breastbone.
Do chest compressions only, at the rate of 100-120 per minute or more. Let the chest rise completely between pushes.
Check to see if the person has started breathing.
Repeat if Person Is Still Not Breathing
If you’ve been trained in CPR, you can now open the airway by tilting the head back and lifting the chin.
Pinch the nose of the victim closed. Take a normal breath, cover the victim’s mouth with yours to create an airtight seal, and then give 2 one-second breaths as you watch for the chest to rise.
Give 2 breaths followed by 30 chest compressions.
Mouth-to-mouth resuscitation for a drowning victim :
Turn the drowning person’s head to the side, allowing any water to drain from his or her mouth and nose. Turn the head back to the center.
Begin mouth-to-mouth resuscitation on land, if possible, or in the water if the injured person needs immediate life-and-death measures.
Strongly breathe four times into the mouth of the injured person as you pinch his or her nose. This helps air get past any water that is clogging the breathing passageways and the lungs.
After four strong breaths, put your ear near the mouth and watch the chest for any breathing movement.
Check the pulse for signs of life.
Repeat the cycle.
***You’re not out of the water once the drowning victim starts to breathe and choke. In fact, the first 48 hours after a drowning incident can be the most dangerous. Complications resulting from water exposure—pneumonia, infection, heart failure—can all occur during this time. Therefore, you should always take a drowning victim to the hospital.
To read more on First Aid, click on the link below.
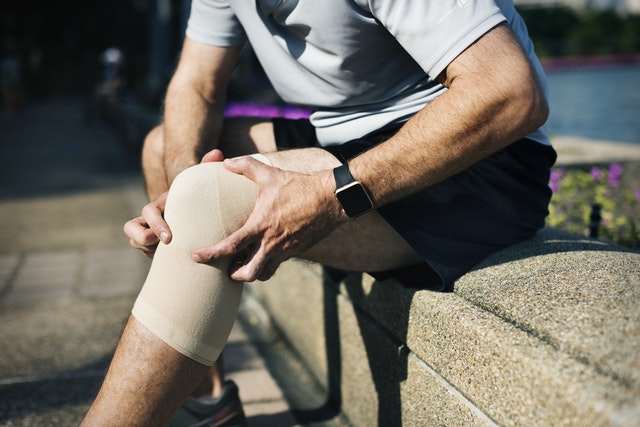
There is so much confusion about this issue because therapeutic icing and heating — cryotherapy and thermotherapy — are rational, cheap, easy, safe self-treatment options for many common painful problems.
Ice is for fresh injuries, and heat is for stiff, aching muscles.
Ice is for injuries — calming down damaged superficial tissues that are inflamed, red, hot, swollen, pain or if it is bleeding/ post surgical pain. The inflammatory process is a healthy, normal, natural process; that also happens to be incredibly painful and more biologically stubborn than it needs to be. Icing is mostly just a mild, drugless way of dulling the pain of inflammation and taking swelling down a bit. Examples: a freshly pulled muscle.
Heat is for muscles, chronic pain, and stress — taking the edge off symptoms like muscle aching and stiffness, which have many unclear causes, but trigger points are probably one of the usual suspects. Chronic pain, especially back pain, often involves lots of tension, anxiety, hyper vigilance, and sensitization, and comfortable heat can soothe a jangled mind and nervous system. Stress and fear are major factors in many painful problems, of course.
Alternating between applications of ice and heat is called contrasting therapy. It’s extremely stimulating and is mostly used to facilitate injury recovery, with unknown efficacy.
What ice and heat are not for
Both ice and heat have the potential to do some minor, temporary harm when used poorly. Heat can make inflammation significantly worse. Ice can aggravate symptoms of tightness and stiffness; it can also just make any pain worse when it’s unwanted.
Both ice and heat are pointless or worse when unwanted: icing when you’re already shivering, or heating when you’re already sweating. The brain may interpret an excess of either one as a threat, but icing is more threatening and when brains think there’s a threat, they may also amp up the pain. Ice seems to be feel more threatening to most people.
Trigger points (painfully sensitive spots) can be surprisingly intense and easily mistaken for “iceable” injury and inflammation. But if you ice trigger points, they may burn and ache even more acutely. This mistake is made particularly often with low back pain and neck pain — the very conditions people often try to treat with ice.
Heat and inflammation are the other particularly bad combination.
How to use Ice
After an acute injury, such as an ankle sprain, or after activities that aggravate a chronic injury, such as shin splints.
Use an ice bag with cubed ice, ice pack or ice massage. When using an ice pack that does not have real ice cubes,use a thin towel between the ice pack and the skin to prevent frostbite.
Do not use ice longer than 20 minutes at a time. More time spent icing does not mean more relief. Be sure the area goes numb, then make sure the skin returns completely back to normal before reapplying.
How to apply heat
Before activities that aggravate chronic injuries, such as muscle strains. Heat can help loosen tissues and relax injured areas.
Apply heat using a heating pad or a hot wet towel.
No more than 20 minutes at a time. Never apply heat while sleeping. Be careful not to burn yourself.
To read more on First Aid, click on the link below.
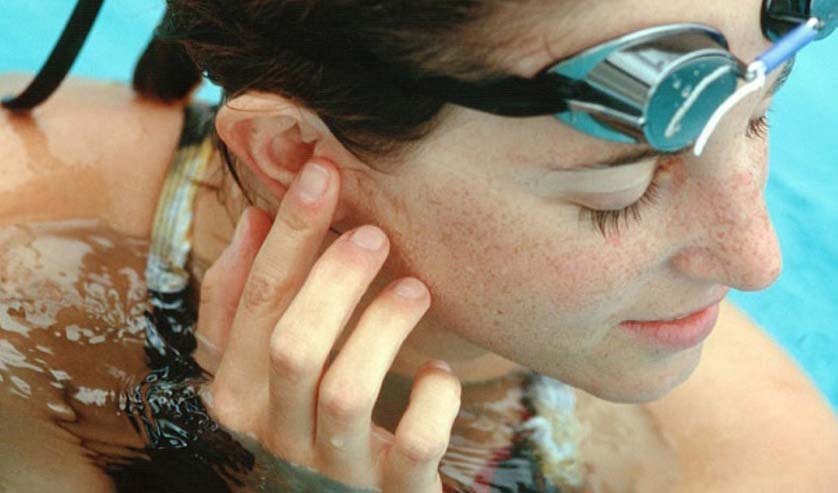
If water does get trapped in your ear, you can try several at-home remedies for relief:
Jiggle your earlobe
This first method may shake the water out of your ear right away. Gently tug or jiggle your earlobe while tilting your head in a downward motion toward your shoulder. You can also try shaking your head from side to side while in this position.
Make gravity do the work
With this technique, gravity should help the water drain from your ear.Lie on your side for a few minutes, with your head on a towel to absorb the water. The water may slowly drain out of your ear.
Create a vacuum
This method will create a vacuum that may draw the water out.
Tilt your head sideways, and rest your ear onto your cupped palm, creating a tight seal.
Gently push your hand back and forth toward your ear in a rapid motion, flattening it as you push and cupping it as you pull away.
Tilt your head down to allow the water to drain.
Apply a hot compress
Using hot but not scalding water, wet a washcloth. Make sure to wring out the washcloth before using it so that it doesn’t drip.
Tilt head downward on the affected side and apply the cloth to the outside of the ear. Leave it on the ear for about 30 seconds, and then remove it for a minute.
Repeat these steps four or five times. It may help to sit up or lie down on the side opposite of the affected side of your body afterward.
Use a blow dryer
The heat from the dryer can help evaporate the water inside the ear canal.
Set the blow dryer to its lowest setting.
Hold the hair dryer about a foot away from the ear and move it in a back-and-forth motion.
While tugging down on the earlobe, let the warm air blow into the ear.
Try alcohol and vinegar eardrops
The alcohol can help evaporate the water in your ear. Alcohol also works to eliminate the growth of bacteria, which can help prevent infection. If the trapped water occurs due to earwax buildup, the vinegar may help remove it.
Combine equal parts alcohol and vinegar to make eardrops.
Using a sterile dropper, apply three or four drops of this mixture into the ear.
Gently rub the outside of the ear.
Wait 30 seconds, and tilt the head sideways to let the solution drain out.
Use hydrogen peroxide eardrops
Hydrogen peroxide can help clear debris, earwax, bacteria, or trapped water from your ear.
Using a clean dropper, place three to four drops of hydrogen peroxide into your ear.
Wait two to three minutes.
Tilt the affected side downward, allowing the fluid to drain out.
Don’t use this method if you think you have any of these conditions:
an outer ear infection, perforated eardrum and eardrum tubes.
Try olive oil
Olive oil can also help prevent ear infection, as well as repel water out.
Warm some olive oil in a small bowl.
Using a clean dropper, place a few drops of the oil into the affected ear.
Lie on the other side for about 10 minutes, and then sit up and tilt the ear downward. The water and oil should drain out.
Yawn or chew
When water gets stuck, moving your mouth can sometimes help to open the tubes. Yawn or chew gum to relieve tension in your Eustachian tubes.
Perform the Valsalva maneuver
This method can also help open closed eustachian tubes. Be careful not to blow too hard. This can damage your ear drum.
Close your mouth and gently squeeze your nostrils shut with your fingers.
Breathe deeply, and slowly blow the air out of the nose. If popping sound noticed, it means the Eustachian tubes have opened.
Tilt your head to allow the water to drain from your ear.
Use steam
Warm steam can help release water from your middle ear through your eustachian tubes. Try taking a hot shower, or giving yourself a mini sauna with a bowl of hot water.
Fill a large bowl with hot steaming water.
Cover your head with a towel to keep the steam in, and hold your face over the bowl.
Inhale the steam for 5 or 10 minutes, and then tilt your head to the side to drain your ear.
12. Try more water
This technique may sound illogical, but it can actually help draw water out of your ear.
Lying on your side, fill the affected ear with water using a clean dropper.
Wait five seconds and then turn over, with the affected ear facing down. All of the water should drain out.
To read more on First Aid, click on the link below.