Medical Helpline in Andhra Pradesh, Gujarat, Uttarakhand, Goa, Tamil Nadu, Rajasthan, Karnataka, Assam, Meghalaya, M.P And U.P
108
Railway Accident Emergency Service
1072
Road Accident Emergency Service
1073
Road Accident Emergency Service On National Highway For Private Operators
1033
Relief Commissioner For Natural Calamities
1070
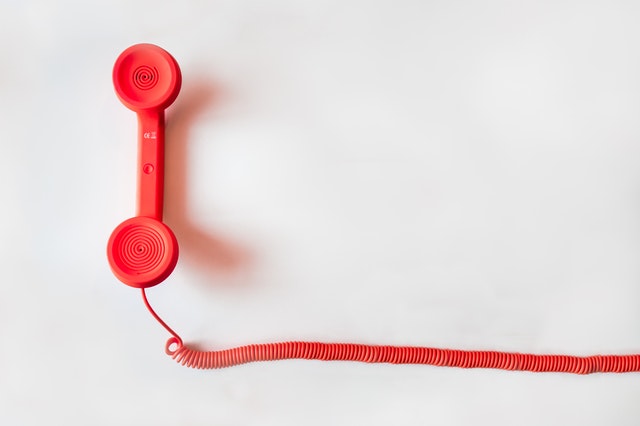
During an emergency, it is all too easy to become overwhelmed, or even confused and disoriented. With a little bit of preparation, you can ensure you go through any emergencies (or even minor scares) in the best way possible.
One of the best ways is to have all the information you might need during an emergency ready at hand.
Below you can find printable sheets with important emergency phone numbers and information customized to your area.
Print the emergency numbers and post them on the fridge and next to every phone in the house. Carry a copy with you, and have one in your car.
Fill out the extra information clearly, in large print using a dark pen. It should be easy to read by kids, or during emergencies when the lights may be very low.
Review the page every few months to make sure all the details are still up-to-date.
If you have a home alarm, make sure you and others in the home know how to use it to activate local emergency services (ambulance, police, fire station)
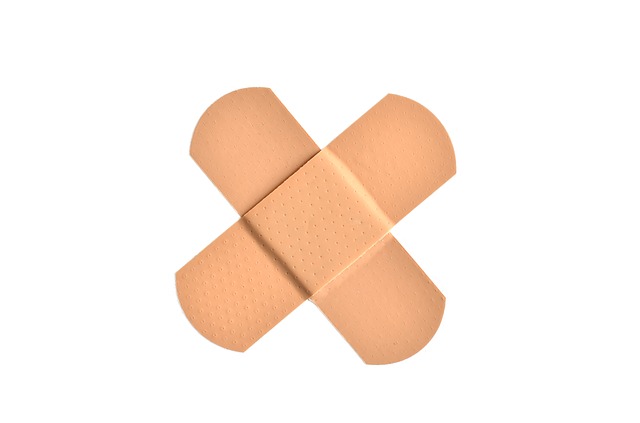
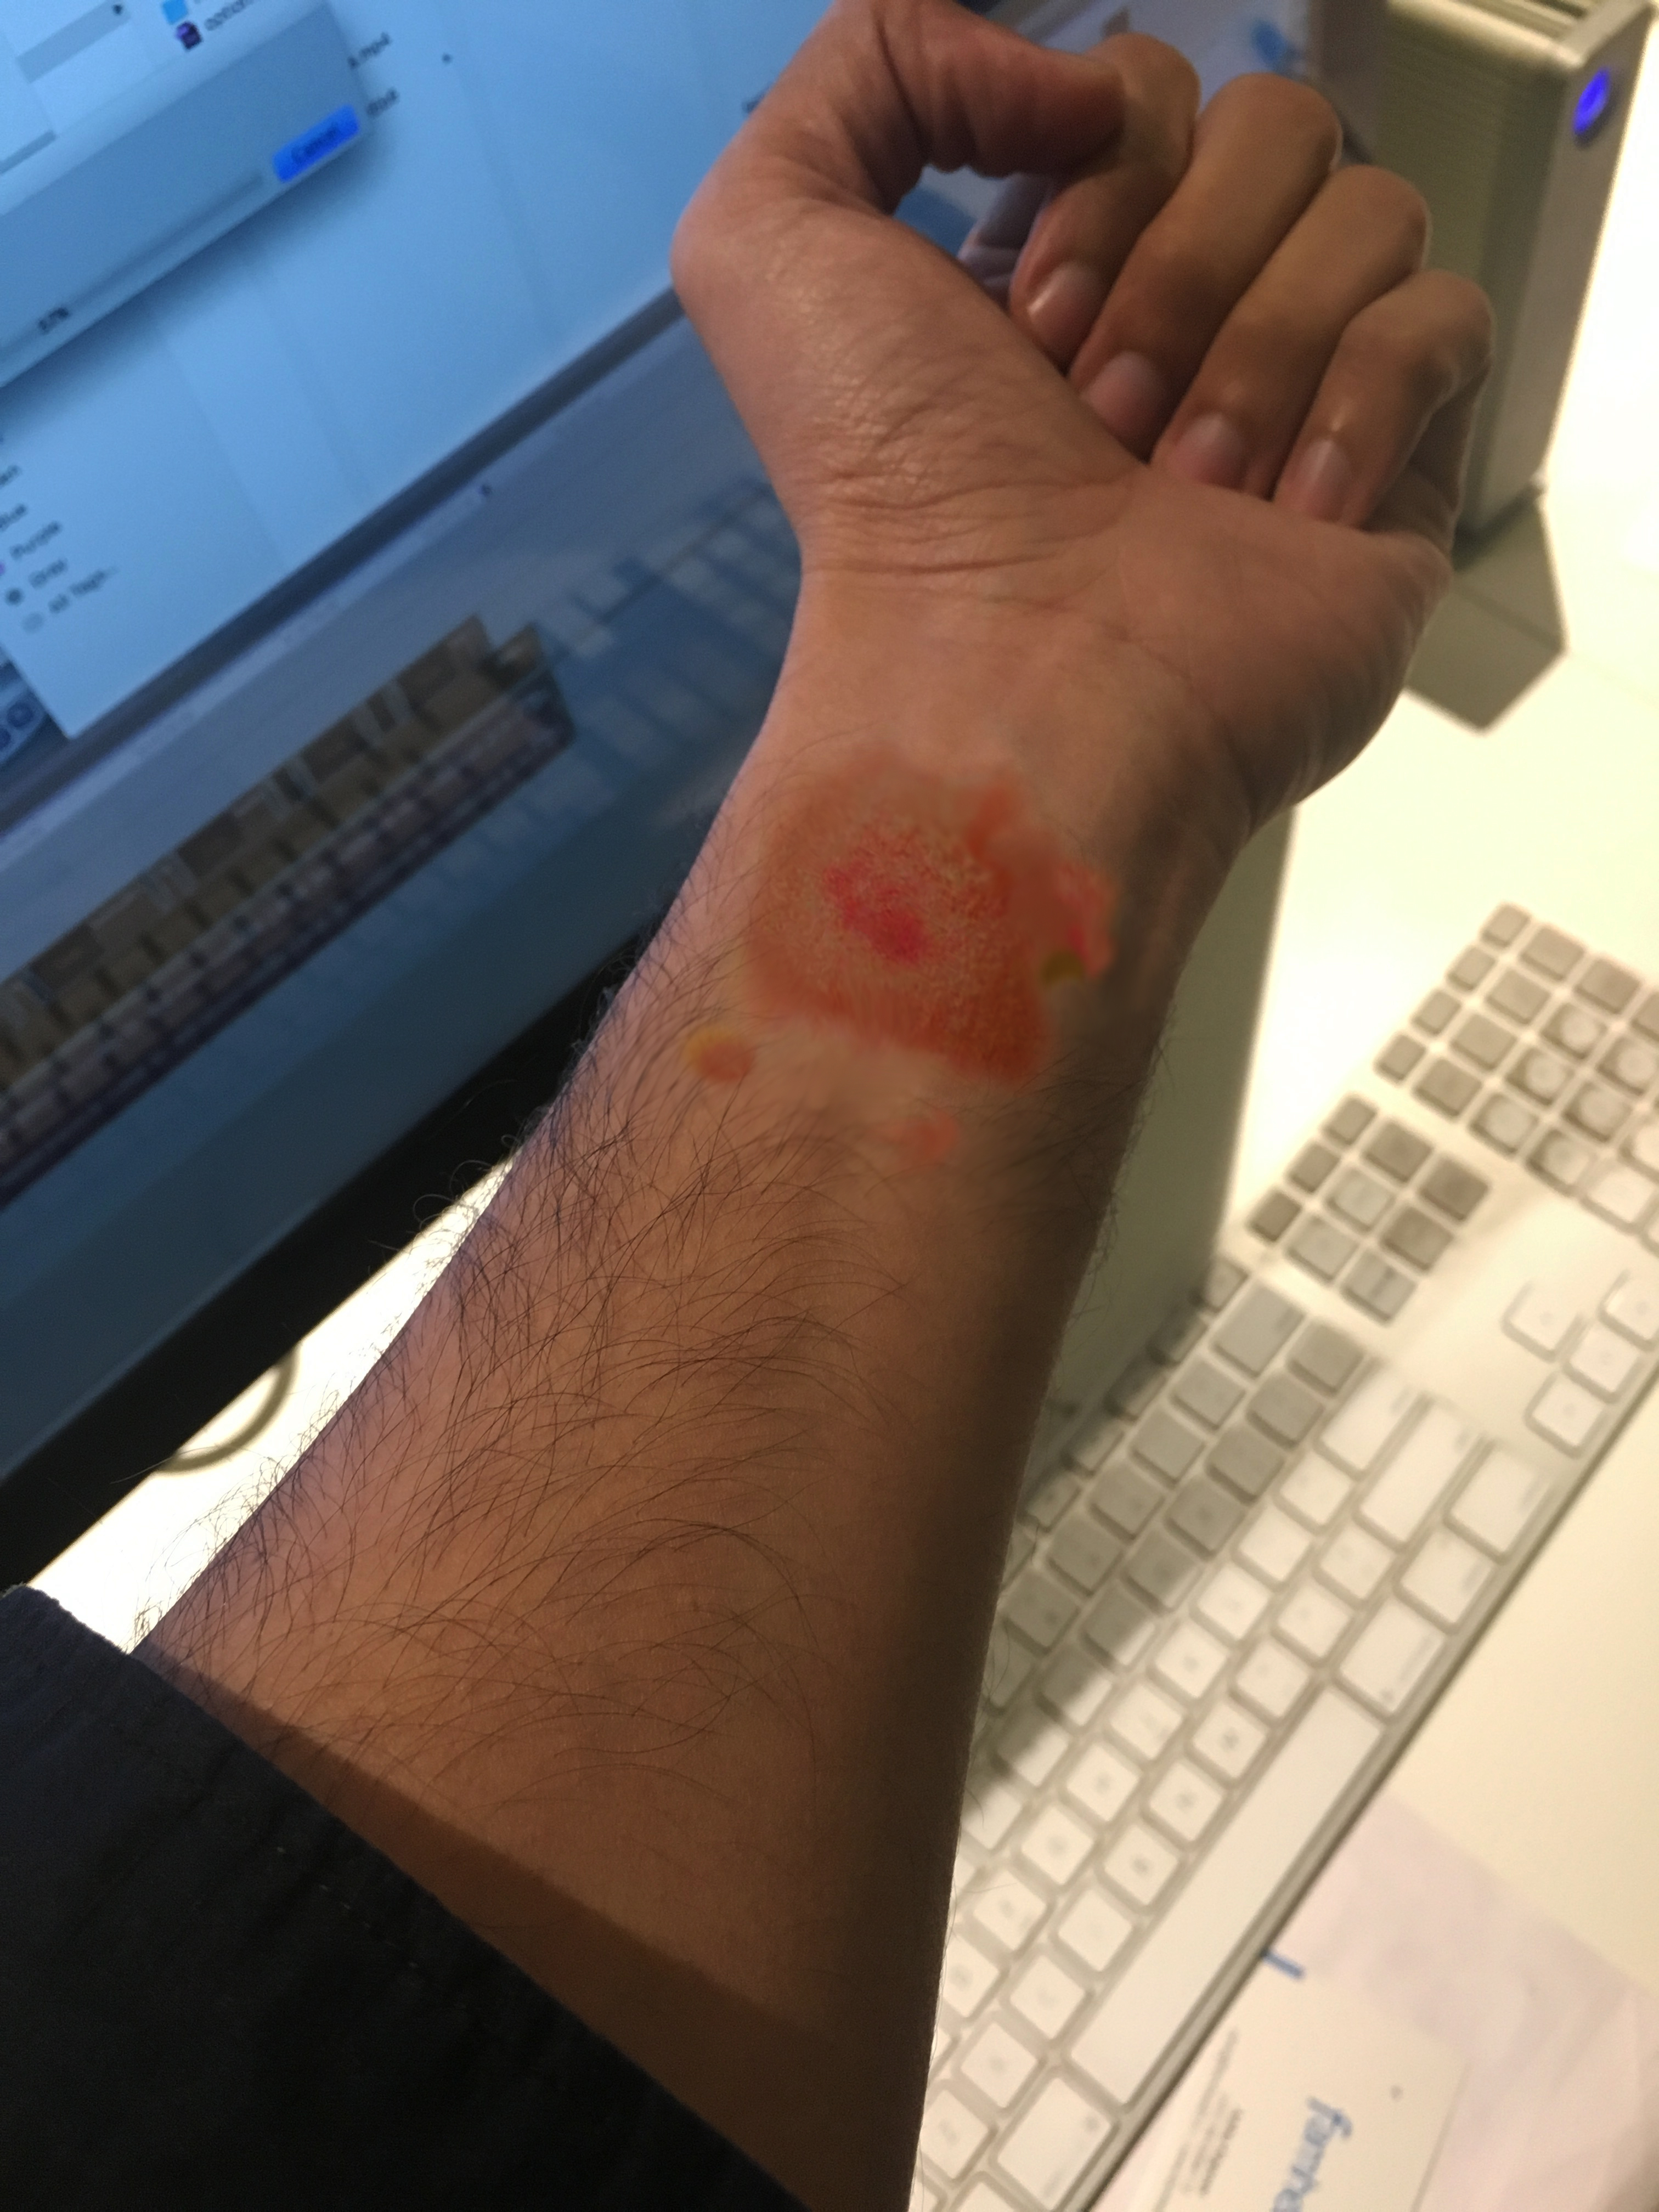
Choose the Right Bandage
Anyone who deals with patients with wounds will agree that selecting the right wound dressings and bandages is crucial to wound healing. It may also be the most challenging part of wound management! With so many choices in wounddressings and bandages.
Is the wound wet or dry? If the wound in question is dry, you might choose a dressing that will donate moisture, such as a hydrogel dressing. If the wound bed is too moist or the wound is highly exudative, you will want to choose a dressing that will absorb excess moisture, such as an alginate dressing.
Is there slough or necrotic tissue present? If the wound bed is granulating and there is no slough, eschar or necrotic tissue present, all that is needed is to protect the fragile wound bed and maintain a moist, normothermic environment. A transparent film dressing or a simple gauze dressing may suffice. However, if the wound has necrotic tissue present, you may need to choose a dressing that encourages autolytic debridement, such as a semipermeable foam dressing, a hydrocolloid or an alginate dressing, depending on the amount of wound drainage.
Are there signs or symptoms of infection? If the wound is infected, you might choose a dressing that has been impregnated with silver or iodine to decrease the wound’s bioburden. These dressings vary greatly in their ability to absorb wound exudate, so amount of wound drainage is another factor that you will need to take into consideration.
Is odor a major concern? When odor is a major concern for the patient, such as in wounds resulting from a fungating cancer or an infected pressure ulcer, you may consider using a charcoal dressing. These dressings work by absorbing the odor-producing gases that are emitted by bacteria.
These are just a few of the considerations that must take into account when choosing a dressing. Cost, ease of use and level of comfort must also be considered and may influence choice of wound dressings and bandages.
How to put on a bandage:
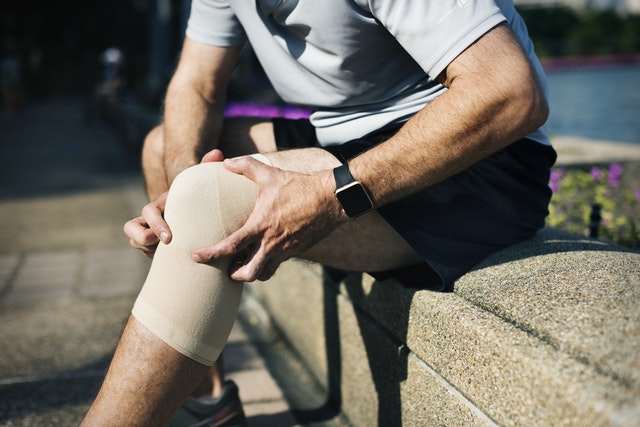
Use a bandage to hold a dressing in place, to control bleeding, to support a limb and stop it moving, and to raise an injured limb to reduce swelling.
There are two main types of bandage:
Roller bandages: use these to hold dressings in place and to support injured limbs, particularly for ankles, knees, wrists or elbows.
Triangular bandages: use these as large dressings, as slings to support a wrist, arm or shoulder injury, or folded as a broad-fold bandage to stop a limb from moving.
If you can’t find a bandage, then you can always improvise by using a piece of clothing or material. For example, you could fold a headscarf diagonally in half to make a triangular bandage for a sling.
How to put on a bandage:
If someone’s hurt themselves and you need to apply a bandage, below are the key things to remember.
Reassure them and explain what you’re going to do before you start.
Make them comfortable by helping them sit or lie down in a comfortable position.
Support the injury by holding the limb carefully, or ask them or someone else to help.
Start bandaging from the front and from the side of the body or limb that’s injured.
Apply bandages firmly but not so tightly that it restricts their circulation.
Generally, wrap the bandage using spiral turns working from the inside to the outside of the limb
For joint injuries, make diagonal turns in a figure-of-eight above and below the joint. See below for specific techniques.
To immobilise a limb, make a broad-fold bandage: lay a triangular bandage flat on a clean surface, fold it in half horizontally so the point touches the base, and then fold it in half again.
Leave fingers and toes peeking out, if possible, so you can press them to check circulation afterwards.
Use pins or tape to fasten roller bandages, otherwise, tuck the bandage in as securely as you can.
Use reef knots to tie triangular bandages: right over left and under, then left over right and under.
Check their circulation: Once you’ve finished, check for circulation, by pressing one of their finger or toe nails for five seconds until it goes pale. If the colour doesn’t come back within two seconds, the bandage is too tight so you’ll need to loosen it and do it again. Check their circulation every ten minute.
To read more on First Aid, click on the link below.
There is so much confusion about this issue because therapeutic icing and heating — cryotherapy and thermotherapy — are rational, cheap, easy, safe self-treatment options for many common painful problems.
Ice is for fresh injuries, and heat is for stiff, aching muscles.
Ice is for injuries — calming down damaged superficial tissues that are inflamed, red, hot, swollen, pain or if it is bleeding/ post surgical pain. The inflammatory process is a healthy, normal, natural process; that also happens to be incredibly painful and more biologically stubborn than it needs to be. Icing is mostly just a mild, drugless way of dulling the pain of inflammation and taking swelling down a bit. Examples: a freshly pulled muscle.
Heat is for muscles, chronic pain, and stress — taking the edge off symptoms like muscle aching and stiffness, which have many unclear causes, but trigger points are probably one of the usual suspects. Chronic pain, especially back pain, often involves lots of tension, anxiety, hyper vigilance, and sensitization, and comfortable heat can soothe a jangled mind and nervous system. Stress and fear are major factors in many painful problems, of course.
Alternating between applications of ice and heat is called contrasting therapy. It’s extremely stimulating and is mostly used to facilitate injury recovery, with unknown efficacy.
What ice and heat are not for
Both ice and heat have the potential to do some minor, temporary harm when used poorly. Heat can make inflammation significantly worse. Ice can aggravate symptoms of tightness and stiffness; it can also just make any pain worse when it’s unwanted.
Both ice and heat are pointless or worse when unwanted: icing when you’re already shivering, or heating when you’re already sweating. The brain may interpret an excess of either one as a threat, but icing is more threatening and when brains think there’s a threat, they may also amp up the pain. Ice seems to be feel more threatening to most people.
Trigger points (painfully sensitive spots) can be surprisingly intense and easily mistaken for “iceable” injury and inflammation. But if you ice trigger points, they may burn and ache even more acutely. This mistake is made particularly often with low back pain and neck pain — the very conditions people often try to treat with ice.
Heat and inflammation are the other particularly bad combination.
How to use Ice
After an acute injury, such as an ankle sprain, or after activities that aggravate a chronic injury, such as shin splints.
Use an ice bag with cubed ice, ice pack or ice massage. When using an ice pack that does not have real ice cubes,use a thin towel between the ice pack and the skin to prevent frostbite.
Do not use ice longer than 20 minutes at a time. More time spent icing does not mean more relief. Be sure the area goes numb, then make sure the skin returns completely back to normal before reapplying.
How to apply heat
Before activities that aggravate chronic injuries, such as muscle strains. Heat can help loosen tissues and relax injured areas.
Apply heat using a heating pad or a hot wet towel.
No more than 20 minutes at a time. Never apply heat while sleeping. Be careful not to burn yourself.
To read more on First Aid, click on the link below.
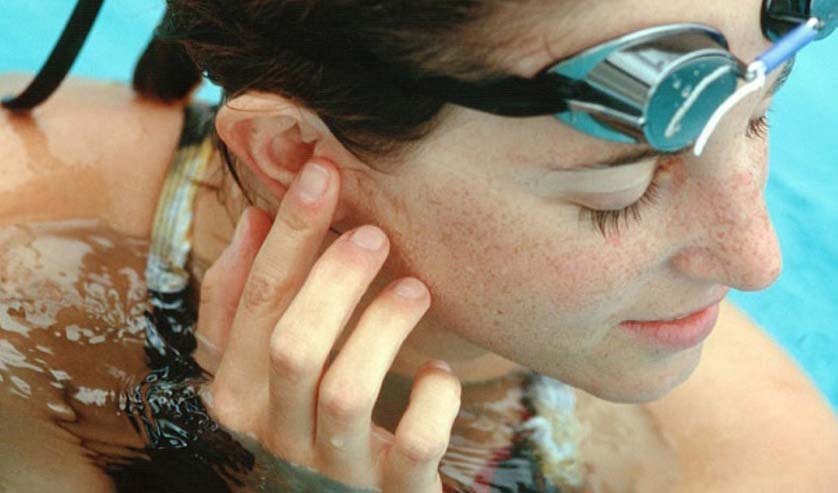
If water does get trapped in your ear, you can try several at-home remedies for relief:
Jiggle your earlobe
This first method may shake the water out of your ear right away. Gently tug or jiggle your earlobe while tilting your head in a downward motion toward your shoulder. You can also try shaking your head from side to side while in this position.
Make gravity do the work
With this technique, gravity should help the water drain from your ear.Lie on your side for a few minutes, with your head on a towel to absorb the water. The water may slowly drain out of your ear.
Create a vacuum
This method will create a vacuum that may draw the water out.
Tilt your head sideways, and rest your ear onto your cupped palm, creating a tight seal.
Gently push your hand back and forth toward your ear in a rapid motion, flattening it as you push and cupping it as you pull away.
Tilt your head down to allow the water to drain.
Apply a hot compress
Using hot but not scalding water, wet a washcloth. Make sure to wring out the washcloth before using it so that it doesn’t drip.
Tilt head downward on the affected side and apply the cloth to the outside of the ear. Leave it on the ear for about 30 seconds, and then remove it for a minute.
Repeat these steps four or five times. It may help to sit up or lie down on the side opposite of the affected side of your body afterward.
Use a blow dryer
The heat from the dryer can help evaporate the water inside the ear canal.
Set the blow dryer to its lowest setting.
Hold the hair dryer about a foot away from the ear and move it in a back-and-forth motion.
While tugging down on the earlobe, let the warm air blow into the ear.
Try alcohol and vinegar eardrops
The alcohol can help evaporate the water in your ear. Alcohol also works to eliminate the growth of bacteria, which can help prevent infection. If the trapped water occurs due to earwax buildup, the vinegar may help remove it.
Combine equal parts alcohol and vinegar to make eardrops.
Using a sterile dropper, apply three or four drops of this mixture into the ear.
Gently rub the outside of the ear.
Wait 30 seconds, and tilt the head sideways to let the solution drain out.
Use hydrogen peroxide eardrops
Hydrogen peroxide can help clear debris, earwax, bacteria, or trapped water from your ear.
Using a clean dropper, place three to four drops of hydrogen peroxide into your ear.
Wait two to three minutes.
Tilt the affected side downward, allowing the fluid to drain out.
Don’t use this method if you think you have any of these conditions:
an outer ear infection, perforated eardrum and eardrum tubes.
Try olive oil
Olive oil can also help prevent ear infection, as well as repel water out.
Warm some olive oil in a small bowl.
Using a clean dropper, place a few drops of the oil into the affected ear.
Lie on the other side for about 10 minutes, and then sit up and tilt the ear downward. The water and oil should drain out.
Yawn or chew
When water gets stuck, moving your mouth can sometimes help to open the tubes. Yawn or chew gum to relieve tension in your Eustachian tubes.
Perform the Valsalva maneuver
This method can also help open closed eustachian tubes. Be careful not to blow too hard. This can damage your ear drum.
Close your mouth and gently squeeze your nostrils shut with your fingers.
Breathe deeply, and slowly blow the air out of the nose. If popping sound noticed, it means the Eustachian tubes have opened.
Tilt your head to allow the water to drain from your ear.
Use steam
Warm steam can help release water from your middle ear through your eustachian tubes. Try taking a hot shower, or giving yourself a mini sauna with a bowl of hot water.
Fill a large bowl with hot steaming water.
Cover your head with a towel to keep the steam in, and hold your face over the bowl.
Inhale the steam for 5 or 10 minutes, and then tilt your head to the side to drain your ear.
12. Try more water
This technique may sound illogical, but it can actually help draw water out of your ear.
Lying on your side, fill the affected ear with water using a clean dropper.
Wait five seconds and then turn over, with the affected ear facing down. All of the water should drain out.
To read more on First Aid, click on the link below.
Though butter has been used as a home remedy, it should NOT be used on any burn.
Rings, bracelets, and other potentially constricting articles should be removed (edema, or swelling from inflammation may occur and the item may cut into the skin).
The burn may be dressed with a topical antibiotic ointment like Bacitracin or Neosporin. Silvadene (silver sulfadiazine) topical is the preferred agent for most burns, and is available over the counter in many locations.
If there is concern that the burn is deeper and may be second or third degree in nature, medical care should be accessed.
Tetanus immunization should be updated if needed.
For electrical burns:
Victims of electrical burns should always seek medical care.
For chemical burns:
Identify the chemical that was involved.
Contact the PoisonControl Center in your area or your local hospital’s Emergency Department. You will be automatically linked to the nearest poison control center. Many chemical burns may be treated with local woundcare. Some chemicals can cause life- and limb-threatening injuries and need emergent intervention. It is recommended that the hotline phone number be stored on your cell phone as well as posted at home and at the workplace.
Victims with chemical burns to their eyes should always seek emergency care.
To read more on First Aid, click on the link below.
A NOSE BLEED is bleeding from the nose that commonly occurs when tiny blood vessels inside the nose are ruptured.
Treatment of Nose Bleed:
To control the blood loss and to maintain an open airway
Procedure:
Sit up straight and tip your head slightly forward.
Note: Do not tilt your head back. This may cause blood to run down the back of your throat, and you may swallow it. Swallowed blood can irritate your stomach and cause vomiting. And vomiting may make the bleeding worse or cause it to start again. Spit out any blood that gathers in your mouth and throat rather than swallowing it.
Use your thumb and forefinger to firmly pinch the soft part of your nose shut. The nose consists of a hard, bony part and a softer part made of cartilage. Nose bleeds usually occur in the soft part of the nose. Spraying the nose with a medicated nasal spray (such as Afrin) before applying pressure may help stop a nosebleed. You will have to breathe through your mouth.
Apply an ice pack to your nose and cheeks. Cold will constrict the blood vessels and help stop the bleeding.
Keep pinching for a full 10 minutes. Use a clock to time the 10 minutes. It can seem like a long time. Resist the urge to peek after a few minutes to see if your nose has stopped bleeding.
Check to see if your nose is still bleeding after 10 minutes. If it is, hold it for 10 more minutes. Most nosebleeds will stop after 10 to 20 minutes of direct pressure.
Put a thin layer of a saline- or water-based nasal gel, such as NasoGel, or an antiseptic nasal cream inside your nose. Do not blow your nose or put anything else inside your nose for at least 12 hours after the bleeding has stopped.
Rest quietly for a few hours.
Conclusion:
Proper management of nose bleed should be applied to prevent prolonged bleeding
If the bleeding is severe or lasts longer than 30 minutes ,send the casuality to the hospital immediately.
To read more on First Aid, click on the link below.
Use tweezers cleaned with rubbing alcohol to remove the object.
If the object is under the surface of the skin, sterilize a clean, sharp needle by wiping it with rubbing alcohol. Use the needle to gently lift or break the skin over the object. Lift the tip of the object out and grasp it with your tweezers.
Squeeze the wound gently to allow bleeding to wash out germs.
Apply an antibiotic ointment to reduce chance of infection.
Put a sterile bandage on the area.
Follow Up
For a minor cut, remove bandage after a couple of days to promote healing.
See a health care provider if the cut doesn’t heal or shows signs of infection, including redness, swelling, pus, or excessive pain.
Having said all this do not forget to take TETANUS immunization BY DOCTOR.
To read more on First Aid, click on the link below.
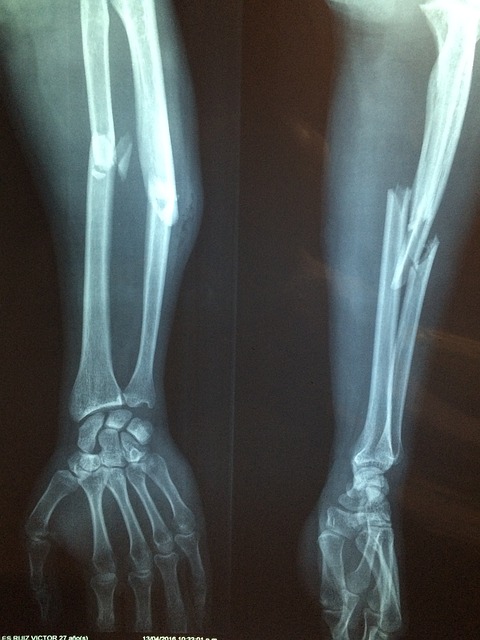
Fracturehappens when one of our bones becomes cracked or broken into multiple pieces. It can result from a sports injury, accident, or violent trauma.
Fractures usually aren’t life threatening, but they do require immediate medical care. We should learn how to recognize the symptoms of a broken bone, provide first-aid treatment, and get professional help if needed.
Symptoms:
Fractures can cause one or more of the following signs and symptoms:
intense pain in the injured area that gets worse when you move it
numbness in the injured area
bluish color, swelling, or visible deformity in the injured area
bone protruding through the skin
heavy bleeding at the injury site
How to provide first aid for fractures:
If it is suspected that someone has a broken bone, provide first-aid treatment and help them get professional care:
Stop any bleeding: If they’re bleeding, elevate and apply pressure to the wound using a sterile bandage, a clean cloth, or a clean piece of clothing.
Immobilize the injured area: If you suspect they’ve broken a bone in their neck or back, help them stay as still as possible. If you suspect they’ve broken a bone in one of their limbs, immobilize the area using a splint or sling.
Apply cold to the area: Wrap an ice pack or bag of ice cubes in a piece of cloth and apply it to the injured area for up to 10 minutes at a time to reduce swelling and pain.
Treat them for shock: Help them get into a comfortable position, encourage them to rest, and reassure them. Cover them with a blanket or clothing to keep them warm.
Get professional help: Call ambulance or help them get to the emergency department for professional care.You can summon professional help if you notice following things:
— You suspect they’ve broken a bone in their head, neck, or back
–The fractured bone has pushed through their skin
–They’re bleeding heavily .
If the person is not breathing we can start giving CPR or help them get to the emergency department by car or other means so a doctor can diagnose their condition and recommend appropriate treatment.
To read more on First Aid, click on the link below.